Showing posts with label diy. Show all posts

Wednesday, February 23, 2011

Before & After

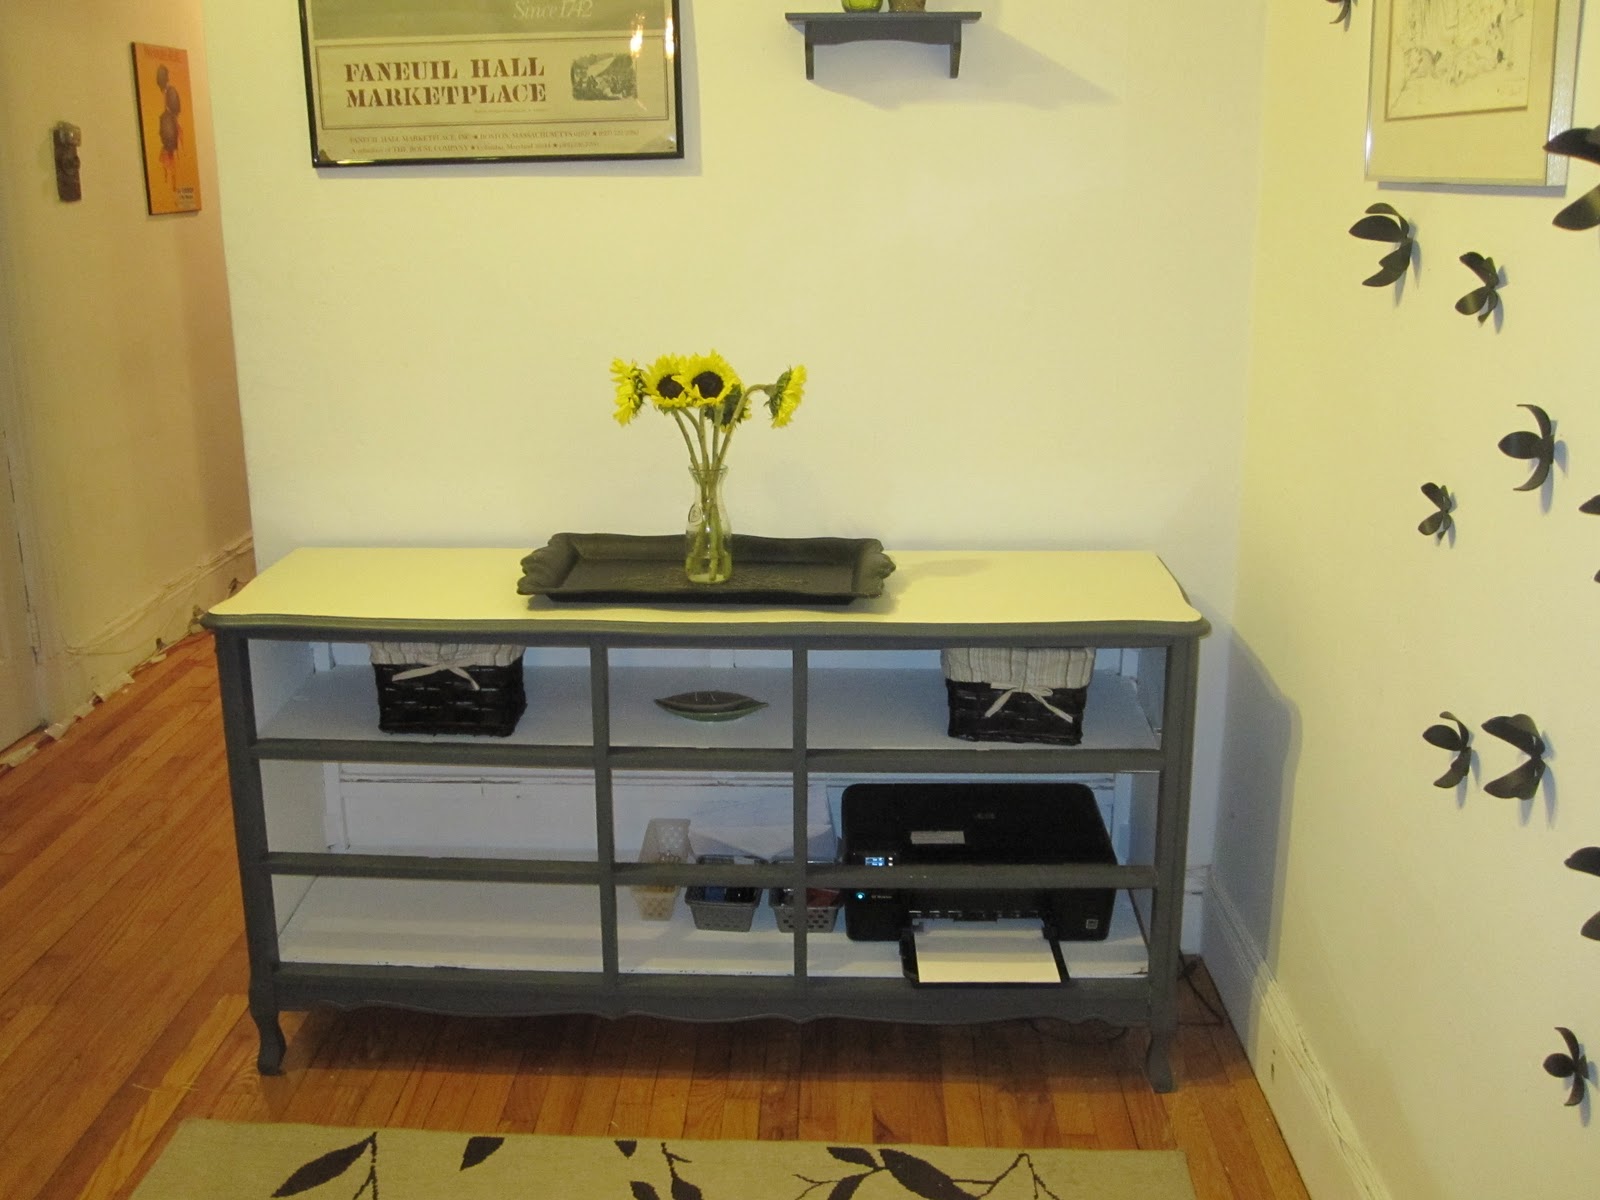
I finally did the next step in my make-over of the drawer-less yellow dresser I found on the sidewalk last month. I may still decide to add doors and/or a middle shelf, but for now it is very functional for my needs, and more attractive than before, too!

Before:


After:
What I did was:

1. Sand the surface lightly, and smooth out dried paint drips from the last coat of paint
2. Rip out the tracks that previously supported the drawers, and the flimsy composite board that previously sat under the drawers
3. Had 2 plywood shelves cut to size at home depot (I actually got 3, but later decided two would serve my needs better)
4. Sand and fill imperfections in plywood shelves. Prime with 2 coats of water-based primer
4. wrestle the shelves into place (I really can't describe that process with a word any less violent than wrestle. They fit so perfectly they stay on their own with out any brackets, that's a tight fit!)
5. Prime and paint the dresser and shelves- the outside of the unit was painted a dark gray (I believe it was the true value color made simple line in "popular") The inside and the shelves were painted pure white. Since the top was laminate, I left it as is, without paint, but with a through cleaning.

Project cost breakdown:
Dresser- free, rescued from the sidewalk
1 qt water based primer $15
eggshell white latex paint- on hand, left over from painting the kitchen trim  (let's call that free)
1 qt Satin paint in "popular" - $12
3 plywood shelves, bought and cut at home depot- $9 (I think...can't quite remember the exact cost, but it was something like that- I remember it was much cheaper than I expected!)

Total cost: $36-- not too shabby.

As for how I am using it, this piece sits in my foyer. I know the printer isn't the most beautiful decor item, but it is so great to have a wireless printer in a common  space like this, since I live in a shared apartment, we all have our computers and office areas in our own bedrooms, and only need one printer between the 5 of us. I also put some office items out there in small containers, everything from pencils, a sharpener, paper clips and stapler, to business envelopes. The tray on top was a goodwill find a few months ago, which I either top with candles or a vase of fresh flowers if I have them. There are also a few small baskets from wallgreens for odds and ends to be tucked away in an easy accessible place.

I already bought materials to make the doors (MDF, trim, hinges and knobs) assuming the printer would be too ugly to have out in the open, but for now I am really liking how easy it is access, and honestly don't think it stands out too badly. I drilled a hole in the back panel of the unit to run cords through, and there is an outlet on the wall right behind, so the cords stay neat and out of sight, which is a big plus.

Sunday, February 13, 2011

DIY CRAFTS PROJECT: paper bunting for the kitchen

Good news: I'm still loving my cheerful blue kitchen. It has been feeling pretty devoid of art work and decoration though, since changing the general color palate in the room led me to start from scratch with wall art. I picked out a print from Etsy that I think will look great, framed, under the pendant light on the wall above the kitchen table. Now I am waiting for the print to arrive, which may take a while, for 2 reasons: 1. I ordered a custom size, so the artist first has to MAKE the print, and 2. The artist I ordered it from lives in the Czech Republic (isn't the internet an amazing thing?) so who knows how long shipping will take.

The other empty wall in the kitchen, the one above the stove, has always been confusing for me as I try and decorate. Since there are no upper cabinets, the space is kind of awkwardly broken into two parts horizontally by a rail where traditional upper cabinets would sit. In the center is the stove, and the hood above the range visually splits the space into 3 parts vertically.  When I consider what to do with this space, I am baffled. Do I try to work with the look of the top 3 vertical sections by placing a large piece of art in each? Do I put something large in the middle only? Should I work against those visual divisions and put something off center, or two pieces? It may not seem like such a big problem, but somehow I couldn't get my head around it. Everything I tried looked either too symmetrical too off balance.


Basically, when I look at that wall I see this:
 Why yes, that is quite an old picture of my kitchen, and yes, I made that little mock-up in Paint!  You can see how previously I had placed one display object or group of objects in each of the top 3 quadrants. Each item was centered in the quadrant but the height of each object was different. I actually didn't mind that concept too much, but it never looked quite right.

Since the general feeling we are going for in our kitchen is fun, whimsical and casual, I started thinking about creating some basic crafty art for that wall myself. I had seen a lot of interesting buntings (you know, those strings of triangular cloth flags?) on both Etsy and featured in house tours in design blogs I read, and I started thinking maybe that could work. In some odd way buntings are kind of in right now, which is funny, because I think most people think of them in terms of party decorations or dated "country" decor. Turns out, not all buntings are lettered to say something along the lines of "It's A Girl!" or are made of red gingham or American flags.


Since I don't have access to a fabric store, I decided to make mine with paper. I headed down to Paper Source, picked up several sheets of 12x12 patterned paper, and as soon as I got home I got to work. The entire project took less than an hour, and cost me about $10. I am still planning to cover the flags with contact paper to protect them in the long term, so probably in the end the project all together will have taken me under 2 hours, and cost $13. I can live with that.

What I used:
different patterned sheets of paper
white ribbon from drug store
pencil, straight edge, scissors, staples

First I laid out my paper, cut one piece to the size I wanted, and then used that piece as a guide to trace and cut the others. I looked  all over for my ruler, but it seems to have gone missing. I used a paint stir stick instead.

Once I had all my triangles cut, I had to do a little math (the horror!) I decided I wanted lots of extra room to drape, since I hadn't decided yet if I was going to hang the bunting in 3 swooping curls (in googling to try and find the proper words to more clearly describe that concept, I stumbled onto this hilariously specific tutorial for how to hang crepe paper at a party.) or simply straight from end to end. Basically I wanted to make sure that whatever I choose I had more than enough rather than less.

Since the length of wall I was using this on is 10 ft, I cut my ribbon to 19 ft (why not 20'? It just seemed like too much). I had made 21 flags, each of which was 6 inches wide at the top where they would attach to the ribbon. Some random futzing around with a calculator led me to decide to put roughly 5 inches of spacing between each flag. From there I just attached each one properly spaced apart, with 2 staples at the tops. I alternated the papers randomly, trying to keep it looking good, but without a specific repeating pattern.

I couldn't take many progress photos, as the process involved both hands. By the way, check out my tiny calculator and stapler...tiny office supplies are adorable, right? Also, notice my attempt at math on that post-it.

After that I just had to hang it. A bit of trial and errror and hemming and hawing led me to decide to hang it in one arch, not multiple swoops like I mentioned above.

Guess what? I look at that wall and I no longer see quadrants! And I think the variety of colors and patterns tie in really nicely to the curtains on the opposite side of the kitchen. And yes, I had way more bunting than I needed...

Anyone want about 7 feet of decorative paper flags and ribbon?


Thursday, January 13, 2011

Dresser Make-over: mid-project progress post

Yes, that post title is a mouthful. Remember the drawer-less yellow dresser I rescued from the sidewalk near my apartment a couple of weeks ago? Well yesterday while snowed in, I began to make some progress on it. Sure it still needs proper shelves, doors etc, but at least now it is a pretty color that looks good in its new home.

Before:

There was some structural disrepair in the right front corner, which I fixed up with a bit of wood glue and a very delicate and technical process that involved hitting the side of the dresser with as much force as i could muster, repetitively until the pieces met and sat flush.

I thought the yellow paint was a cute idea, and I always wish I could be bold enough to introduce some pops of bold primary yellow into my design scheme, but it never seems to work out quite right. I knew as soon as I saw the piece in the space that I wanted it to be a deep, rich charcoal gray.

The original paint job was messy, with drips of paint in a lot of places. So I first gave the piece a pretty thorough sanding with my little Black and Decker Mouse (I left the top, which is laminate, alone. A little scrub down with cleaner was all it needed). Then I gave it two even coats of charcoal gray paint.

As you can see I removed the bottom piece, which used to sit under the bottom of the drawers. This piece had some water damage. I played around with my jig-saw for a bit trying to salvage pieces, but eventually gave up. That weird piece of fabric sitting inside is a tablecloth. I am  not really sure why I put it like that. It won't be staying there. Especially since it is actually my mother's and I should return it.

Next comes the cabinet doors and figuring out if I can actually execute the plan that is currently developing in my head. At the moment that vision is something like this:

click to make larger.

We'll see!

Also, is anyone else as amused as I am by my foyer's ability to transform into a workshop at a moment's notice?

Tuesday, January 11, 2011

A few small projects in the bedroom

I did a couple quick projects in my room this past weekend, some simple things to help me feel organized. First, I made some changes to my ikea Aneboda wardrobe. You know the kind, with the corrugated plastic that is translucent, so you can see whatever mess the thing is meant to hide. I used a roll of soft blue contact paper, and some decorative drawer pulls to change its appearance a bit. I am still debating adding some decorative moulding around the crown to give it a more feminine look that matches better with the pulls. I also have a second more modern pair of pulls I may use instead. I am going to give it time.

Before: (ikea stock photo)
 
After: 
(poorly lit bedroom photo...does that red suitcase peeking out bother you as much as it does me?)
I also made the insides of the doors into functional space. I adhered cork board to the inside of the left door, and a jewlery organizer on the other side. The jewelery holder has clear compartments just the right size for storing hair clips and elastics and earrings and things, many of which had previously lived jumbled in a bowl on my bookshelf. The organizer will have to be cut down a bit and re-hemmed eventually, as it is a tad bigger than the door.


Clearly I am going to need to replace this with a better picture, but in the meantime, admire my tiny but efficient "only closet space in the room":


Yep, that's all the closet space I have...that's where my work clothes, a dozen pairs of shoes, and also all my linens live (see them jammed up at the top? guess I will be refolding and organizing everything one of these nights before retaking this picture). 

Another small project I did was replacing the decorative paper on my night stand. Over a year ago I rescued that night stand from the sidewalk, cleaned it for ages (the thing was so dirty...) and then bought some decorative paper over at Papersource and a little spray adhesive. i also went to the hardware store and had a piece of thick tempered glass cut to fit the top. well, after a year of wear, the thing was needing a bit of attention. I reapplied the paper, and sealed it with some Elmer's glue and water (classic decoupage) and then put a coat of clear spray polyurethane on top of that for extra longevity.

Even more daunting of a project was clearing out the drawer, which had become a catch all for everything. Most stuff ended up in the trash, and once I was down to only essentials I lined the drawer with some of the pretty blue contact paper left over from the wardrobe project above, and organized my remaining must-haves in a sectioned jewelery tray from Marshalls.


I also recently bought the pretty silver tray on top from a thrift store. I polished it  (with vinegar!) back to its former glory. Now it makes a perfect landing place for my glasses, hair pins and rings when I go to bed.


And finally, a view of the room with both items and their new-found organizational glory:

Thursday, December 30, 2010

Smells like DIY...

Look at this terrible picture of the item I rescued from the snowbank (I mean sidewalk...) last night. Yep, it's a dresser. Somewhere along the line it seems to have lost its drawers (mercy!) but that's ok. I plan to give it a new life and whole new purpose. Right now I am deciding between finishing it out as open shelving, or creating doors and making it into a server type cabinet. More to come soon!

PS- a special thank you to my friend Gabby (Gabbie? Yo Gabba Gabba?) who rushed to my rescue to help me carry this thing home at only a moment's notice, and my roommate Danielle who helped us as we struggled to get it up the stairs.

Monday, December 6, 2010

In which I go even more insane than that other time.

Remember that time crazy Hannah covered the refrigerator in patterned contact paper? Well I think I one-upped myself.

If you are thinking this looks familiar, it probably does. I posted about this project in mid-November right after its completion, but soon felt so embarrassed by the grainy dark pictures and took down the post. Anyway, want to see the crazy orange chevron wall in my kitchen? I think it is fun. And since I love to cook and experiment in the kitchen, it is definitely a place I like to have fun, so why shouldn't the space itself be fun?


Want to see a bit of the process?

First I taped out the pattern I wanted. I may have been a bit drunk when I started this. That would at least explain that weird gap of a few inches along the left wall.

The next step was painting white paint over the tape to seal any spaces where paint could bleed through with the existing wall color. My friend Gabby helped me out with this (if there is one tip I have when it comes to painting projects...invite some friends to help! We had so much fun!)

Then, up went the orange (we had ran out of the exact orange used on that rail, so we had to mix some up to match) Gabby and Sophie helped, as we hummed along to Janis Joplin and ate cupcakes and had a generally pretty awesome time.

After 2 coats of paint, the tape came down. Relatively cleanly, even. Though there were a few spots that were less than perfect.

Boo, peeling. Hopefully no one will notice!


Sunday, November 7, 2010

I've been painting doors.

What have I been up to? I've been painting doors.

Like this blue door in the bathroom, with a custom mixed paint color thanks to one of my friends at the hardware store where I used to work.


I also added mirrored decals from TJ Maxx. Now I just  need to decide what to do about that old rusted doorknob. Ignore it since I rent, and with the lock mechanism it may be complicated to replace? I imagine a nice glass knob in its place.  


I also painted the door of our broom closet with chalk board paint, creating a kitchen message center for myself and my roommates to use. 

Also, see that blue tape in the upper left section of that picture? Consider that a sneak peek into a project to come. I just need to work out my final plan, and make sure my roommates don't hate it.


Monday, October 11, 2010

October DIY projects

I recently found these curtains in the clearance section at Marshalls. Having recently bought some fabric for a few different projects, I was surprised to notice that at their clearance price they were cheap enough that even just buying the fabric to sew them from scratch would have been more expensive. They were the wrong size, but both the color and the price were right.

 All it took to make them perfect for the space was adding a little extra fabric in a contrasting color to the bottom. I used two oversized dish towels which I already had on hand.


Project $$ breakdown:
2 curtain panels, $14
2 dish towels, on hand
total cost: $14


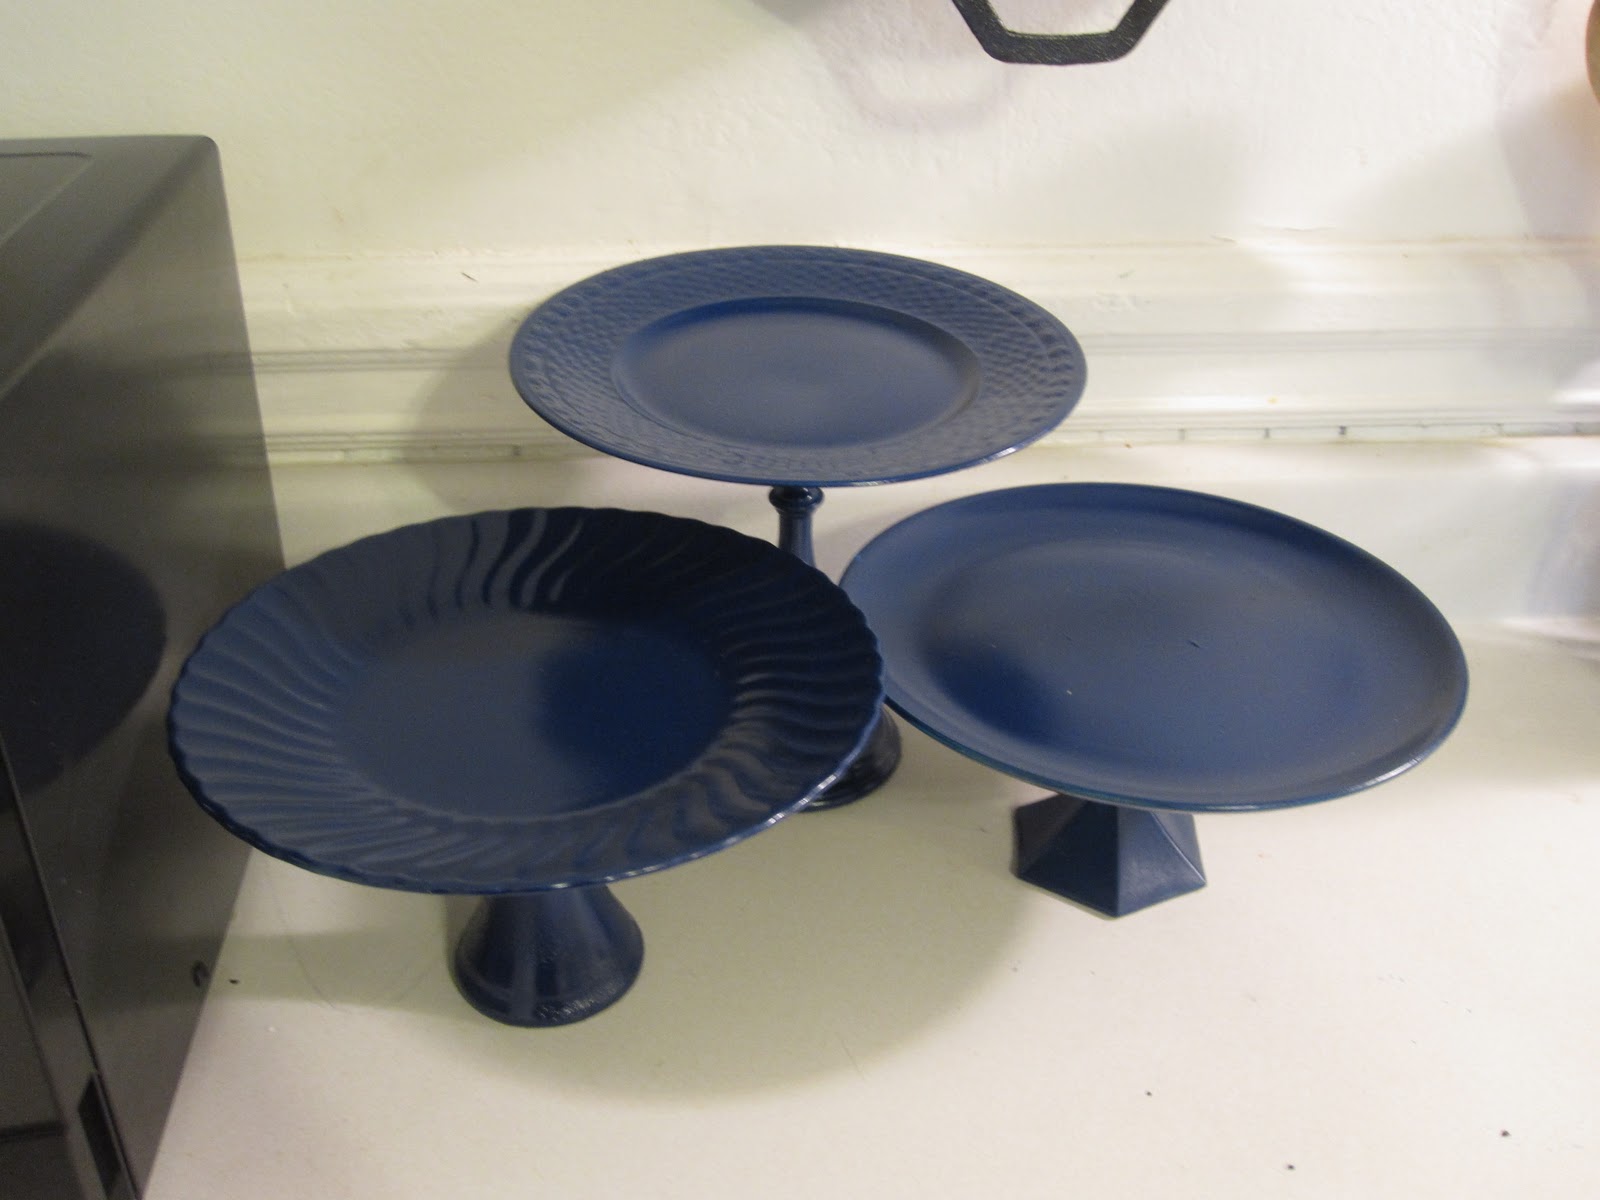
Another quick project I did recently was spray painting my homemade cake stands. a coat each of spray primer and paint brought them from this:


 To this:


This afternoon, after returning from a weekend in the new york, having noticed the full bloom of colorful fall leaves along the drive, I was feeling particularly aware of the season. I carved a pumpkin to celebrate!
Happy October, everyone!

Monday, October 4, 2010

The story about THE WINDOW


I found this old chippy 6 paned window on a curb in Kenmore square. I saw it and instantly wanted it, the only problem being that it was under a pile of other renovation refuse, bricks, wood scraps, sharp broken pieces of glass and tile... and I was on my way home from work wearing a hard to move in pencil skirt and heels! I managed to dig it out from the pile though (I got a lot of strange looks as I did).

Once I removed the heavy items on top of it, finally able to get to the window I was digging for, I had to pause for a moment, as I came eye to eye with a tiny gray mouse, who had apparently just been hanging out chilling on top of my window under cover from the other pieces of trash. He looked terrified, he completely froze in place on top of my window. We stared each other down for at least 30 seconds, my not wanting to try and shoo him for fear of getting bitten, and he perhaps thinking that if he waited long enough I would leave. We both stood our ground. I saw his body trembling, quick mouse-breaths and the whir of mouse-y heartbeats were almost audible to me, as I stood suspended, unnoticing of anything else happening around me. Eventually someone walked by on the sidewalk, and their movement seemed to snap the mouse out of his mouse-y trance, and me out of mine. He ran from the window, and down under a root of a nearby tree. I tried not to think of mouse-y germs and diseases as I picked up my window, and proceeded to walk it home. And let me tell you- it was terribly heavy, and the day was terribly windy, and as I mentioned above I was truly not dressed for the task, so I had a hell of a time. And yes, the first thing I did once i got it home was to wipe it down with disinfectant, and wash my hands for about 10 minutes straight.


I knew I wanted to keep some of the chippy aged character of this unique find, but the last thing I wanted was to keep it white. My kitchen had enough white as it was, go check the "before" photo in this post if you haven't seen it. So I choose not to strip or sand off the existing paint, but instead to add a very thin coat of orange on top of it. I did not, however, wish to keep the messy why-not-paint on the glass while you're at it look of this piece- I guess whoever painted this last didn't bother to scrape off any paint they may have accidentally gotten on the glass. Too bad, because if you go after those bits with a scraper when they haven't completely cured yet (say in the first 24 hours after painting or so) it is a breeze to scrape off. Waiting 10 years, however, makes that a very daunting task. It took me more than an hour to scrape off the excess paint from the glass, and my arm was tired and sore by the time I was done.


Next I  gave a super light sanding to the paint surface- not to remove the paint underneath, but just to give the new paint something to stick to. Then a couple very thin coats of the orange paint left over from the hook-rail, applied with a sponge brush. I also screwed in some little "D" hooks in the back corners for hanging, and wiped down the glass with glass cleaner.

 Here it is hanging in my kitchen on the top right.

I still plan to put something behind the glass, I am leaning toward mirror, to reflect the light from the pendant which hangs in front of this window in it's spot in my kitchen. Originally I was planning on using decorative paper, I even ordered a 30"x30" wallpaper sample in the pattern used at the heading of this blog from this website. For $5 including shipping they sent me a nice big sheet of this paper, and the woman I corresponded with in customer service was great- I wasn't sure what size the samples came in, and knew I could only make use of one if it was large enough for my project, so I wrote them an inquiry, detailing my project, and the by the end of that day I had heard back, and was told the sample size is usually 24"x24" but if I noted in the order comments that I wanted 30x30 they would happily send it to me! This was such an easy interaction, I feel sort of sad now that I don't think I will be using it, I was planning to email the customer service rep who helped me with a finished picture of the project and thank her again for her help! Anyone have any fun ideas to use up a 30"x30" piece of unique vintage inspired kitchen wallpaper?

PS- you can check out a new change this window saw recently, when I redid my kitchen here.

Wednesday, September 22, 2010

Sunday, September 12, 2010

Movie Night Snacks

 
Tonight I had a few friends over for a movie night, and decided to provide more in the way of snacks than the traditional buttered popcorn. I made peanut butter flax cookies, served pretzels with two types of mustard for dipping (Trader Joe's garlic aioli mustard and honey mustard) as well as some pretzels which I dipped in melted dark chocolate, spiced almonds, and spiced roasted chickpeas. I served these goodies on cake stands I put together with candlesticks and plates found at goodwill (one of those projects that seems to be contagious right now in the diy/home decor blogosphere, and couldn't be easier!) Also, it is of note that the roasted chickpeas are food blog fad I am a couple years late for, but glad I have finally made them! I used the spice mix suggested on Kalyn's Kitchen, and made extra to use later on vegetables or all kinds of things just like she suggested!

I also got well on my way today on two refinishing projects: turning an old window into kitchen art, and updating a vintage dining chair for use as a boudour chair in my bedroom. Sanding, reupholstering and painting, oh my! 

I hope you all enjoyed your weekends! What is your favorite movie night snack?

Thursday, September 9, 2010

September is...

September is an exciting time of year. For many a new school year starts, vacations end, the trees start changing colors, and the air grows the tiniest bit brisk. In Boston, September is moving season. All the rentals turn over at once in a massive flurry of moving trucks, which cause traffic all over town on the first of the month. I, luckily, did not have to deal with the stress of moving this month, as my roommates and I have decided to stay put for another year. In fact, I have never had to move on September first, my last few apartments have had odd lease start dates that left me in the only moving truck on the street (November 1st, January 1st, November 18th- the last was a fluke related to delayed renovations). So instead of September equaling moving month in my mind, it is instead merely "sidewalk shopping month"- a time to take advantage of the discarded items left behind by those that moved. And this year I celebrated Sidewalk Shopping Month heartily. In the last week I have focused most of my energy on restoring the objects and furniture I picked up, and in turn, had very little remaining energy for cooking/baking.
A few of my finds

In the last week I did make a somewhat disappointing nectarine cake, and a few basic loaves of french bread, so it is not that I have not been producing food at all, simply that I have put less time toward it than usual.

There are many good food related holidays of note in September: it is National Honey Month, as well as Better Breakfast Month- plenty of potential for great recipes there! Single day holidays of note include Sewing Machine Day (September 10th- I have been contemplating picking up a used sewing machine I keep seeing at Goodwill, is this a sign? Should I go ahead and buy it come the 10th?) National Apple Dumpling Day (17th), and of course, the always amusing International Talk Like a Pirate Day (Ar- th' 19th). I think this month will require at least 2 little-known holiday posts.

As it has been keeping me quite so busy though, I do think I should show some pictures the finds/work I have done related to my very own celebration of "Sidewalk Shopping Day".


Project #1- new to me coffee table:

I found this coffee table in the trash on September 1st. It was scratched and banged up, covered in cracked and peeling polyurethane, and didn't look like much, but it was solid wood, and the legs were in nice shape. Over labor day weekend I sanded off the poly & stain from the top, restained/poly'd, and primed and painted the legs shiny black. I really love the result, what do you think?

Before:


In the middle of the sanding process, beautiful raw wood starting to emerge:

(yes, I sanded this in the back hall...my extension cord couldn't reach outside...I had a lot of sweeping to do after!)

I then stained it with minwax polyshades in dark walnut. I had a true learning experience, since I forgot to pick up paint thinner, and in trying to clean my brush ended up with polyurethane all over my hands, thick and sticky and uncomfortable. I tried everything I could think of, including coating my hands with nail polish remover, which did nothing besides sting in any open cuts. In the end I sheepishly headed down to my local hardware store, held up my sticky hands and told one of the employees my dilemma. He was so helpful and sweet, and suggested I use kerosene instead of paint thinner because it would be less harsh on my skin. Worked like a charm, and I managed to avoid fire until I had a chance to shower, I was a little concerned that my hands were a bit flammable.

After:

by the way, those are coasters sitting on the table on the right...I will definitely enforce their use to keep my new/old table looking nice.

Project #2- That Ceramic Elephant

I was guilted into taking this elephant home. One of my roommates and I snatched the coffee table mentioned above and a couple other things from a couple guys moving out of the building behind us. They were sitting around on the stoop, trying to convince people to take their stuff and save it from the garbage truck. Happy to see eager customers, the former owner of my elephant explained how sad the poor elephant would be if he was trash. I fell for it, and I liked the elephant anyway, so it was easy. To be honest though, I had no good place to put said elephant and would have passed it up all together were it not for my keen ability to sympathize with inanimate objects. So the Elephant went home with me, and I painted him gray:


Before.


After. He now sits in the hall with our wireless router on his back, a noble animal guarding our interwebz.

Project #3- Purple Kitchen Chairs

Until recently my kitchen has definitely been the most boring room in the house. Which is kind of sad, given how much time I spend in it cooking/baking/doing endless dishes. White particle board cabinets (standard cheap rental style) white walls, too bright overhead lighting, and standard ikea kitchen table and chairs made for a room that left very little of an impression. I love living in a space that is comfortable and clean, well put together, colorful, a bit unusual, and functional. This kitchen was functional, but that was it. It was lacking personality. My roommate Sam and I took the first step towards a room with some personality recently when we painted the high chair rail which runs along one wall of our kitchen a deep shade of orange.This project spiraled and somehow inspired me to collect mis-matched vintage wooden chairs and paint them a unifying shade of plummy-purple (which I think plays off the orange fabulously). A kitchen full of funky details, and poppy unexpected colors? Much better than the boring space of a few weeks ago! A few more little projects to come in my kitchen, wouldn't you like to see the updates?
What happy chairs...

Happy Sidewalk Shopping Month!