Showing posts with label desserts. Show all posts

Tuesday, August 31, 2010

Peanut Butter Flax Seed Cookies


I noticed a product at Trader Joe's recently which intrigued me: natural peanut butter with flax seeds. I started wondering what peanut butter cookies baked with this product would be like. High in omega 3s, for one thing, and doesn't everyone need more of that? Studies have suggested that Omega 3 may do everything from prevent cancer to improve mood and lessen depression. Who wouldn't want all that? And in the form a crunchy little peanut butter cookie?  Also, these cookies are gluten free, so hey, you can even make them for your gluten intolerant friends you never know what to bake for...unless of course they are also allergic to peanuts.


The recipe for these cookies seems to be popping up everywhere. My cousin had a picture book when we were young in which (I believe) a little mouse made these cookies, and the book included the recipe. I have been making simple peanut butter cookies like this ever since, but unfortunately have no memory of what the book was called, and my google searching comes up empty.

I simply substituted flax seed peanut butter for regular, and kept the recipe the same: 1 part peanut butter (crunchy is best) 1 part sugar (I used raw cane sugar) 1 egg. The dough will be thick and rather greasy. Roll it into small balls, place on a lined baking sheet, and then flatten the dough balls with a fork, leaving the classic imprint shape. I sprinkled some raw cane sugar over the top before baking. Bake 10-12 minutes in a 375 degree oven, let cool, then enjoy!

Peanut Butter Flax Seed Cookies:
1 cup flax seed crunchy peanut butter
1 cup sugar
1 egg 
1 tsp salt
1 tsp vanilla extract

Tuesday, July 27, 2010

I-Love-Lemon Bars


I love lemon. On chicken, on fish, on greens, on pasta, in tea, IN DESSERTS, it just seems you can't go wrong. And lemon bars, rich and creamy, lemony (which may sound redundant, but such genuine lemon flavor is not always present in lemon desserts), not-too-sweet, refreshing served chilled, surprisingly good served slightly warm, seem like the perfect summer-y dessert. Also, their lemon-custard like filling is reminiscent of my great aunt Lossy's lemon pie.

I brought these to an outdoor movie event in a park near my apartment. They were a great snack to pass around and share.

The recipe I used, from Baking Illustrated, is the best I have found so far, relatively easy to make, very quick, and hard to mess up so long as you manage your time well. What really impressed me is how well they kept after a couple of days in the fridge- the crust stayed crunchy and not a bit soggy. I suggest preparing the filing ingredients (squeezing the lemons into a bowl, cracking the eggs into a separate one, zesting the lemons, etc) while the crust chills, then waiting until the last 6 minutes of the crust's pre-cook to assemble the steps for the filling, as the recipe stresses that both the crust and filling should be warm when combined.

Lemon Bars
From Baking Illustrated: The Practical Kitchen Companion For The Home Baker
by the Editors of Cook's Illustrated Magazine

For The Crust:
1 1/4 cups all purpose flour
1/2 cup confectioners sugar (plus more to decorate)
1/2 teaspoon salt
1 stick (8 Tablespoons) unsalted butter- softened slightly and cut into 1-inch pieces

For The Filling:
7 large egg yolks, plus 2 large eggs
1 cup plus 2 tablespoons granulated sugar
2/3 cup juice from 4-5 lemons, plus 1/4 cup finely grated zest
pinch salt
1/2 stick (4 Tablespoons) unsalted butter, cut into 4 pieces
3 Tablespoons heavy cream

Directions:

For the Crust:
1. Line a 9" square baking pan with parchment paper, folded or cut to fit, one piece lengthwise, and another laid in perpendicular to that, with at least an inch or two extra hanging over the sides of the pan to aid in lifting out the lemon bars later.
2.Combine the flour, sugar and salt in a food processor. pulse a few times until combined.
3.Add the butter and pulse a few more times, until the butter is broken up, and the consistency of the mixture is a bit like course grain. 
4. Dump the mixture into the bottom of your lined baking pan, and press it flat against the bottom of the pan.
5. Refrigerate for 30 minutes.
6. Pre-bake the crust for 20 minutes at 350 degrees.

For the Filling:
1. In a medium glass or stainless steel bowl,whisk together the egg yolks and whole eggs until combined, only about 5 seconds.
2. whisk the sugar into the egg mixture, then add the lemon juice, zest and salt, and whisk again, 5 seconds.
3.transfer the mixture into a saucepan over medium heat, and add the butter chunks. 
4. Stir constantly for 5 minutes until butter is completely dissolved.
5. Pour immediately through a strainer into a clean glass or stainless steel bowl.
6. Mix in the heavy cream.
7. Pour the filling mixture into the (warm) crust, then bake at 350 for 15 minutes.
8. Finish with a dusting of powdered sugar once the filling has cooled.


Thursday, July 8, 2010

Cherry Blueberry Tart - And How To Salavage A Bad Day


I made this tart with the 4th of July in mind- red cherries, blueberries, and pastry cream seemed like a pretty patriotic combination (though I will admit, the egg yolks, vanilla and liqueur in the pastry cream turned it a bit yellowy/tan rather than white) and since I have been trying to make desserts inspired by holidays this year (my green st. patty's day cake was a hit) I decided to make this to continue the theme.

As it happens, the day I made this was shaping up to be JUST NOT A VERY GOOD DAY. Things were not going my way, and I felt angry and hurt by a series of events that morning. I was hesitant to start a project while feeling that way, worried that I would not be able to concentrate and put my best effort in. After some convincing from my favorite (and only) sister, I ended up discovering that making this tart was in fact just what my day needed. I turned on London Calling (which makes for great "I'm angry and I'm gonna bake things!" music), threw on my apron, and sang along while I worked. And I may have danced a bit. I am sure I looked like a fool, but by the time the tart was done, not only did I have a delicious dessert to show for it, my bad mood had been magically repaired. And I knew how to make pastry cream.


The components of this recipe were gathered from a few different sources, the pastry cream is from this recipe at joyofbaking.com as is the apricot glaze. The crust was a basic graham crust from The New Best Recipe which I added a bit of cinnamon and nutmeg to for interest.

Basic Graham Crust
Adapted from The New Best Recipe by the publishers of Cook's Illustrated
9 graham crackers (1 package)
5 tablespoons of butter
2 tablespoons sugar
1 teaspoon cinnamon
1/2 teaspoon nutmeg

Directions:
  1. Preheat the oven to 315F
  2. Melt the butter in and set in a medium sized mixing bowl
  3. Break the graham crackers into pieces and place in a food processor. Process until it is the consistency of cornmeal and no large pieces remain.
  4. Add the sugar, cinnamon and nutmeg and pulse to combine.
  5. Pour the mixture into the bowl with the butter, combine until all pieces are evenly coated with butter.
  6. pour into a greased tart pan, and press into the bottom of the pan and around the sides using the bottom of a cup measure or small bowl.
  7. Place on the middle shelf in the oven and cook for 15-18 minutes.
  8. Let cool.

Pastry cream
from joyofbaking.com

1 1/4 cups milk (I used heavy cream as I had it on hand)
1/2 vanilla  bean, split lengthwise- (or substitute 1/2 tablespoon vanilla extract if needed, it's what I did...)
3 large egg yolks
1/4 cup granulated white sugar
1/8 cup  all-purpose flour (I ended up using whole wheat flour, again, what I had on hand!)
2 tablespoons cornstarch
3/4 tablespoons liqueur (I used Grand Marnier) 

Directions:  (I cut and pasted these from the original source, joyofbaking.com as it is rather complicated and I didn't want any of the steps to get lost in translation, though I did cut out a few side notes they had included and reformatted it as I found the previous format a bit confusing to the eye, but feel free to check the link above to view the original if what I have done here is confusing.)  
  1.  In a medium-sized stainless steel bowl, mix the sugar and egg yolks together with a spoon. (Never let the mixture sit too long or you will get pieces of egg forming.) Sift the flour and cornstarch together and then add to the egg mixture, mixing until you get a smooth paste.  Set aside.
  2. Meanwhile, in a saucepan combine the milk and split vanilla bean on medium heat until boiling. (The milk will foam up to the top of pan when done, so watch carefully.)
  3. Remove from heat and add slowly to egg mixture, whisking constantly to prevent curdling. (If you get a few pieces of egg (curdling) in the mixture, pour through a strainer.) 
  4. Remove vanilla bean, scrape out seeds, and add the seeds to the egg mixture.  
  5. Place the egg mixture back into a medium saucepan and cook over medium heat until boiling, whisking constantly. When it boils, whisk mixture constantly for another 30 - 60 seconds until it becomes very thick and it is hard to stir.   
  6. Remove from heat and immediately whisk in the liqueur. Pour into a clean bowl and immediately cover the surface with plastic wrap to prevent a crust from forming. Cool. If not using right away refrigerate until needed, up to 3 days. Beat before using to get rid of any lumps that may have formed.
Apricot Glaze
Adapted from joyofbaking.com

1/4 cup apricot Jam
1/2 Tablespoon Grand Mariner
1/4 Tablespoon water 

  1. Heat the apricot jam and water in a small sauce pan over medium heat until liquid
  2. Remove from heat and add the liqueur, stir
  3. If needed, strain to remove any lumps
  4. allow to cool.
Then, to bring it all together:

 The last step of course, was to cut the fruit (I left the blueberries whole, but cut the cherries in half and removed the pits) and then assemble:

Into the cooled crust: smooth the pastry cream into an even coat at the bottom, layer the fruit on top of it in concentric circles, then paint on the glaze over the fruit with a pastry brush. Refrigerate. Happy Belated 4th of July!


Sunday, June 13, 2010

ice cream cookie sandwiches

On a hot, humid summery night can you imagine anything better than this homemade chocolate chip cookie ice cream sandwich? Me neither. Made with dark chocolate broken into chunks, and a bit of whole wheat flour, these homemade cookies made a perfect base for rich, cold vanilla ice cream. yum.
Using your favorite chocolate chip cookie recipe (I used the classic tollhouse recipe below, but subbed in some whole wheat flour and used crushed dark chocolate in place of traditional chips) bake the cookies until crispy (these stand up better against the moisture of the ice cream than a softer chewy cookie would) and then let cool fully. spoon some vanilla ice cream in between two cookies, and if you are not going to eat it immediately, wrap in plastic wrap and pop in the freezer. Perhaps too simple to be worth the write up? but oh, so good. Go make this.


Nestle Tollhouse Cookies (one recipe everyone ought to know!)
Makes 60 cookies


  • 2 1/4 cups all-purpose flour
  • 1 teaspoon baking soda
  • 1 teaspoon salt
  • 1 cup (2 sticks) butter, softened
  • 3/4 cup granulated sugar
  • 3/4 cup packed brown sugar
  • 1 teaspoon vanilla extract
  • 2 large eggs
  • 2 cups (12-oz. pkg.) Nestle Toll House Semi-sweet morsels

Directions:

Preheat oven to 375° F.

Combine flour, baking soda and salt in small bowl. Beat butter, granulated sugar, brown sugar and vanilla extract in large mixer bowl until creamy. Add eggs, one at a time, beating well after each addition. Gradually beat in flour mixture. Stir in morsels. Drop by rounded tablespoon onto ungreased baking sheets.

 Bake for 9 to 11 minutes or until golden brown. Cool on baking sheets for 2 minutes; remove to wire racks to cool completely.

Sunday, May 23, 2010

How to get rid of whipped cream- a story in pictures

simple & good berry crumble recipe here

I also wanted to take this moment to mention that those who can't afford therapy should really try whipping cream.  Positively cleansing, in 7 minutes or less out goes all the anger, and all that is left is a light, fluffy dairy topping.

Sunday, May 16, 2010

Sunday afternoon baking- Classic Crinkle Cookies


You all know how I love alliteration. Classic Crinkle Cookies- how can I resist? This is my attempt at the Betty Crocker original, and no, these weren't made at Christmas time in my childhood, I wonder if I was missing out? These chocolate cookies are rolled in powdered sugar, and as they bake they expand, creating a web of cracks that show the dark chocolate center from underneath the powdered coating. The ingredient list is simple, all things I ordinarily stock for baking projects, and while they do take a while to make (up to 4 hours total) most of that time is for the batter to chill, the active prep time is actually quite short, and the preparation itself is simple. Since they require so long to chill in the fridge, I chose to make the batter in the morning and bake them in the late afternoon. In between, a trip to the Children's Museum with some friends seemed like a perfect diversion.

Crinkle Cookies
Adapted from Betty Crocker
Makes 20-24 cookies
*Note- if you use dark chocolate that does not contain milk ingredients, this is a dairy-free recipe
1/4 cup vegetable oil
2 oz Dark Chocolate or Baking Chocolate
1 cup granulated sugar
1 teaspoon vanilla extract
1 tablespoon cocoa powder
2 eggs
1 cup flour
1 tsp baking powder
1/4 tsp salt
1/2 cup powdered sugar

The original recipe claimed to make 6 dozen cookies. This struck me as REALLY A LOT OF COOKIES. So, I got Brian, my math savvy roommate, to help me convert this recipe to a smaller yield. Though I have to say, tasting them now that they are done, I have no doubts 6 dozen would disappear quickly. Also, I once again had trouble doing the math to figure out how many squares of chocolate to use- I usually buy the pound-plus chocolate bars from Trader Joe's and store the left over in the freezer for my next baking project/midnight sugar craving. But, it all turned out. If your planning on using the Dark Chocolate pound-plus chocolate from Trader Joe's, let me save you some time and math: 4.5 squares was sufficient for this recipe.

All of the ingredients in this recipe were basics I usually keep in stock in the house.

1. Melt the chocolate.Start by chopping the chocolate into small pieces. put those pieces in a metal bowl, and set the metal bowl inside a pan with a few inches of water simmering on the stove. stir until smooth. Remove from heat and allow to cool.


2. In a large bowl, combine the sugar, vanilla extract and chocolate, stir together and then add in the egg and remaining ingredients besides the powdered sugar. Stir until blended evenly, then cover the bowl with saran wrap or wax paper and set in the fridge to chill.

3. Allow 3-4 hours for batter to chill in the fridge.

4. Preheat oven to 350. Pour powdered sugar into a shallow dish. Line a cookie sheet with parchment paper (alternately, you can use butter or non-stick spray on a cookie sheet) 

5.Roll batter into 1 Tablespoon sized balls, then roll in the powdered sugar, coating generously. lay out on your baking sheet leaving sufficient room for cookies to expand.  Bake at 350 for 10-12 minutes.


These fudgey, rich cookies are easy to make, and will definitely draw attention when you bring them out as an afternoon pick-me-up, or on a cookie plate at a dinner party. They are simple, dairy-free, and bound to be a crowd-pleaser! Also, can I remind you, they have that sweet alliteration going for them.

Sunday, May 2, 2010

Sunday afternoon baking- Chocolate Fudge Tart

                   Consulting my cookbooks for a good sunday afternoon baking recipe.

There is one reason I will probably never be a great baker. Baking involves math, my worst enemy. If you were to ask me off hand "what is 7 + 45?" I would probably break down crying before I could give you an answer. Especially if counting on fingers isn't allowed. So far, I have managed to get away with doing quite a bit of baking without encountering much math at all. Today that changed.

This morning I decided to bake a simple chocolate tart. I went to the grocery store, and picked up my supplies (the store, by the way, was a mob scene due to the current water emergency in the Boston area, lines down each aisle of people eagerly waiting to buy bottled water, most stores have already sold out) and hurried home to get started. No sooner than I took my ingredients out of the bag was I slapped in the face with a real life, contextual math problem. The kind of thing math teachers always say will happen, how you will use math in your everyday life and be grateful that they taught it in school. Well, I guess that all never really got through to me, because as I thought it through my mind could not make sense of any of it.

If I have a 500 gram bar of chocolate, and the recipe calls for 140 grams, and my bar has 40 squares....how many squares do I need for this recipe? My pulse quickened, and my breathing grew labored. MATH RELATED ANXIETY ATTACK!  How can I ever hope to bake well if I can't figure out how many damn chocolate squares this tart will need?

Luckily enough I have two roommates much more math minded than myself, one who works in accounting, and one who hopes to become a high school math teacher. I consulted them and was walked through each step (with a calculator of course, those like me with numerical anxiety always have a calculator close by so as never to be trapped doing math in our heads) the answer turned out to be 11.2squares. Cutting .2 of a square of chocolate is also confusing, but not nearly as bad as the multiplication and division  required to get to that answer. I double checked my work on my food scale, turns out my estimate was a bit over due to my rough attempt to cut .2 of a square, so I ate a few bits until it equaled out. Success!


Chocolate Fudge Tart
Adapted from Baking & Desserts, the essential recipe collection Parragon

For chocolate fudge filling:
140g high quality dark chocolate, finely chopped
3/4 cup unsalted butter, diced
3/4 cup flour
1 1/3 cup granulated sugar
1/2 teaspoon vanilla extract
6 eggs, beaten

The original recipe called for a basic from scratch pie crust or ready-made shortcrust pastry. I chose to make a graham cracker crust instead, both because it is less intimidating than a from scratch traditional crust, and less embarrassing than using a store bought crust. Also, I love the combination of chocolate and graham flavors. I made the graham crust using this tutorial. I love tutorials...

Additional ingredients:
3/4 cup whipping cream whipped and mixed with ground cinnamon
confectioners sugar for dusting

It also occurred to me that flavoring the whipping cream with orange extract instead of cinnamon, and replacing the confectioners sugar with finely grated orange zest could make an interesting variation.

orange whipped cream variation:
1 tsp finely grated orange zest
1/2 tsp orange extract
1 Tbsp sugar

After baking this I discovered that the amount of filling created by this recipe is far more than could fit in the pan I was using, a standard tart pan with lift out bottom and scalloped sides. I experimented with cupcake servings and ramekin servings with the remaining filling, and another batch of graham crust. These would have been so cute in mini tart tins, I will have to buy some for next time! If you are making this recipe for the same standard tart pan I was using, and do not wish to have extra for mini tarts and such, simply halve the recipe for the filling, and you should be all set.

  • Preheat the oven to 350
  • Create the graham crust as instructed in the tutorial linked above, set aside.
  • In a double boiler pan, (or simply a small heat proof bowl placed inside a sauce pan with simmering water) melt the chocolate and butter together until smooth. Remove from heat.
  • In a seperate bowl whisk together the eggs, sugar and vanilla. 
  • Once smooth, add the melted chocolate mixture and stir.
  • Pour this mixture into the tart pan on top of the graham crust.
  • Place in the oven for 40- 50 minutes
For the whipped cream topping:
  • using 3/4 cup of whipping cream, combine with 1 tsp cinnamon, or 1 teaspoon finely grated orange zest 1 Tbsp sugar and 1/2 teaspoon orange extract
  • whip with egg beaters or standing mixer until thick, about 5 minutes


I was very impressed with the outcome of this recipe, I think this may become a new go-to. It is simple to make, but very sophisticated, never mind ooey-gooey and chocolaty. The addition of the orange infused whipped cream worked well to add brightness to this very rich dessert. I would make this to bring to any event, almost anywhere, and feel confident that it would impress.

Monday, April 5, 2010

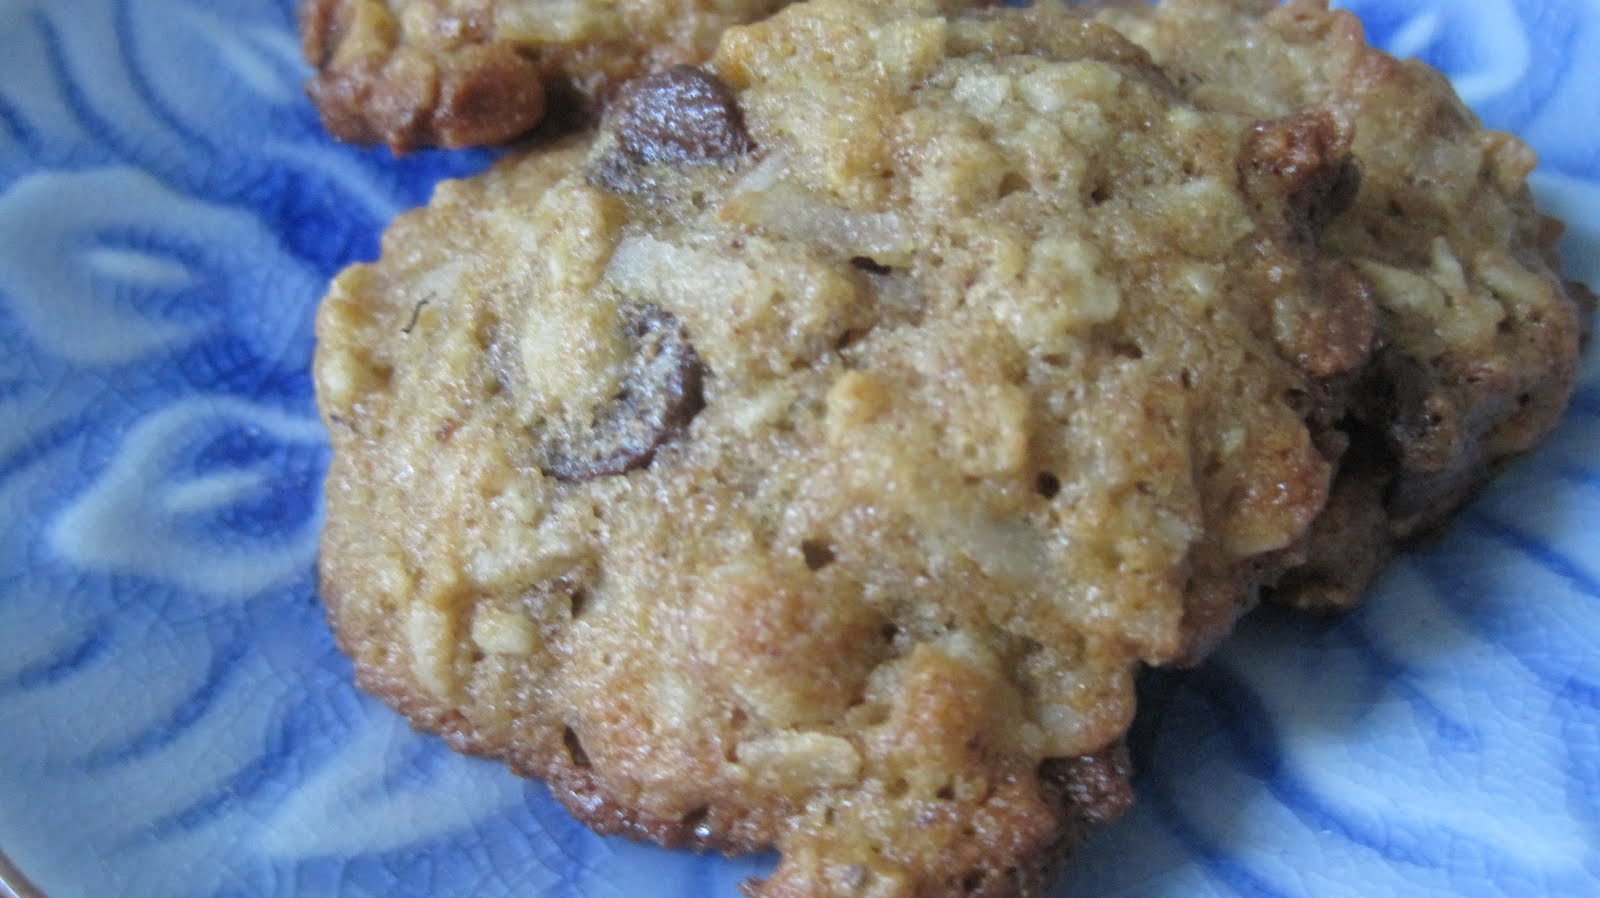
Plantain-coconut cookies


I first started toying with this cookie recipe a few weeks ago, on a cold day in late march. The furnace in my building had been broken for over a week, and a final day in the 20s was enough to render my usually too warm apartment freezing. My roommates and I bundled in our sweaters and blankets, waiting for the oil company man to arrive. We ended up turning on the oven in an effort to warm up the house a bit. I decided at that moment: wouldn't it be better if we were slowly warming up with the oven on, and there were cookies? Yes. Of course. So I went out in search of interesting ingredients to bake into cookies. The following recipe is not exactly what I made that day, the first batch was a bit too cakey, and seemed to be missing something...This is a reworked version, adding honey and nutmeg to my original recipe, and reducing the flour and white sugar drastically, which I baked up yesterday, one of the warmest days so far this spring.

These cookies are sweet but not too sweet. Oats, chocolate chips, plantain, coconut, walnuts and nutmeg come together to create a wholesome cookie that tastes quite a bit like banana bread. These cookies are crispy at the edges and remain very soft inside.

Plantain-coconut cookies:
makes 4 dozen+ small cookies
2 sticks unsalted butter, softened (or 1 cup margarine. whipped and lite versions may not work as well)
1 tsp baking soda
2 eggs
1 cup finely chopped walnuts
3/4 cup whole wheat flour
1/2 cup brown sugar
6 oz chocolate chips
1.5 cup oats
3/4 cup shredded coconut
1/4 cup sugar
2 tbsp honey
1 tsp salt
1 tsp nutmeg
2 tsp vanilla extract
2 ripe plantains

Note: If you don't have plantains, bananas can be easily substituted. Just reduce the sugar in the recipe, as bananas are naturally sweeter than plantains.

I think golden raisins or dried currents would make an interesting substitution for the chocolate chips in this recipe, and for those who don't like coconut, increase the amount of oats for an easy substitution.
Preheat the oven to 350.

In a large bowl combine the butter, eggs, sugar, plantains (cut into large chunks), vanilla and honey. Mash together until smooth. add whole wheat flour, baking soda, salt, nutmeg, oats, and coconut. mix until blended, then add walnuts and chocolate chips.

I created uniformly small cookies using a teaspoon measure for each. I used parchment lined baking sheets to reduce sticking.

Smaller cookies only need 8 or 9 minutes to cook, crispier if allowed to cook for 10 minutes. larger cookies may need 10-12 minutes.