Showing posts with label baking. Show all posts

Monday, June 3, 2013

Zucchini & Thyme Tart *REVISITED*

One of the early posts on this blog was a recipe I made up myself. And it is still one of my favorite recipes on this blog. I made it again for a pot luck I was invited to a few days ago. Complete with new pictures, here is a revisit of the original post:


This zucchini & thyme tart is simple and elegant, and tastes just as good at room temp, so you can make it ahead, or even bring it to a potluck to one up the standard pasta salads.

I made the crust from scratch using the Flaky Pie Crust recipe by Mark Bittman in How to Cook Everything, which is quickly becoming one of my most trusted resources; I made the filling by mandolin slicing zucchini which I then quickly sauteed with olive oil, garlic, fresh thyme, salt and pepper and dried herbs, and layering it with finely shredded Gruyere and Parmesan cheeses. The outcome was savory and delicious, not to mention beautiful. And each step of the process was pretty easy.


Zucchini & Thyme Tart

Flaky Pie Crust (from Mark Bittman's How To Cook Everything)
1 cup plus 2 tablespoons all-purpose flour, plus more for rolling*
1/2 teaspoon salt
1 teaspoon sugar
8 tablespoons (1 stick) cold unsalted butter, cut into about 8 pieces
3 tablespoons ice water, plus more if necessary

Zucchini Filling:
3 medium Zucchini
 2 TBS olive oil
1 tsp ground black pepper
1/2 tsp salt
2 tablespoons fresh chopped thyme leaves
1 1/2 cups finely grated Gruyere cheese- packed very loosely
1/2 cup shredded or shaved Parmesan or Parmesan, Ramano, Asiago blend
Grape tomatoes (halved) to garnish (optional)

* this second time around I used whole grain flour, I was pleasantly surprised that the texture and flavor were still great (a little nuttier in the flavor, which worked well with the dish) a little bit more water was required to form the dough than called for with white flour. 

Combine the flour salt and sugar for the crust in a food processor, and pulse twice. add the butter chopped into small pieces, pulse until blended. the mixture should look very granular, pour into a bowl and add the ice water, and use your fingers to combine until you can roll it into a ball. refrigerate and then roll out following the directions from Mark Bittman in the link above. Store the crust in the refridgerator until you are ready to bake it. It should go into the oven COLD!

Preheat the oven to 375.

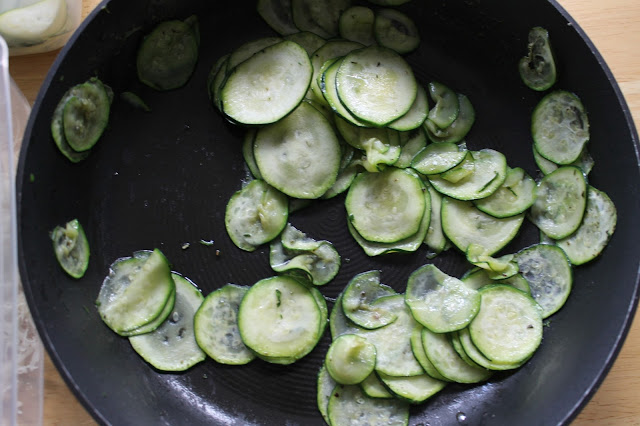
Slice the zucchini into thin oblong pieces using a mandoline slicer if you have one, if not slice as thinly as you can by hand.

In a large bowl, pour half the olive oil over the zucchini, and add the salt, pepper, chopped thyme. combine in the bowl so that the zucchini are evenly coated in oil and herbs. Remove from heat just as zucchini pieces start to look a bit transparent.


Assembling the tart:
Sprinkle grated cheese sparingly onto the bottom crust layer of the tart.
Starting from the outside, lay zuchini slices overlapping in a circular pattern, until an even layer of zucchni covers the exposed flat tart bottom.


Sprinkle cheese mixture over the layer evenly. Then repeat with a new layer of zucchini, followed by a cheese layer.


I found 3 layers of each, zuchini and cheese to work well for the size of my tart pan.

Lastly I placd some sliced grape tomatoes and fresh thyme leaves over the top for garnish.

Place in the oven and cook for 20-30 minutes or until both crust and cheese is golden.


Make this dish a light summer meal by pairing it with a salad and white wine, or eat a slice as a side or appetizer.

Monday, November 19, 2012

Oreo Truffles

I've been lazy when it comes to cooking lately. The closest to a real cooked meal I've made in weeks has simply involved roasting some vegetables and making salad (from a bag). Let's blame it on being a student again. Midterms, papers, plenty of readings...how does one find the motivation to do such things as cook a real meal?

But I love to cook! And it's finally soup season! And holiday baking season is around the corner! I have to get on this thing!

I've decided to ease myself in. I started with a baking recipe that actually involves no baking. Oreo truffles. Yes, they are a bit reminiscent of Sandra-Lee creation. They involve three (processed) ingredients. But they come out pretty damn delicious, and are a nice little segue back into actual cooking and baking projects (hey, and they do involve melting chocolate, that counts as cooking, right?)

Undoubtably you've seen these at a holiday pot luck, food blog or elsewhere. I am not really sure where they originate. When I mentioned them to a friend, she immediately remembered someone she knows who makes these, and I myself can remember a schoolmate bringing these into class once or twice in the past. They are ubiquitous. Could that be because they are simple to make, delicious, and involve ingredients you can get nearly anywhere? You could shop for this recipe at Wallgreens or even 7-11 if you wished. All you need is a pack of Oreos, a package of cream cheese, and some chocolate for melting.


I went to my nearby expensive organic grocery store, because...I was too lazy to take the bus somewhere else. Hence I made mine with organic Newman-os, organic neufchatel cheese, and fair trade chocolate chips, haha. Completely unnecessary, but maybe someone out there will appreciate the odd intersection of organic cooking and recipes that call for store bought cookies.

The instructions are easy:

Ingredients:

8oz oreos (or Newman-os)
8oz cream cheese- not whipped (or Neufchatel)
1 bag chocolate chips

Optional: 1 TBS coconut oil, cream or shortening. I used coconut oil (organic, obvs.)

Supplies:


  • Ziplock bag and a rolling pin or other heavy object (or a food processor)
  • Wax paper lined baking sheet, serving plate or cutting board (this doesn't have to be oven safe)
  • Double boiler- I always improvise, and use a sauce pan, with a bit of water, and lay over a slightly smaller metal bowl. Works perfectly.


  1. Crush a package of Oreos (I found this easy to do by sealing the cookies inside a ziplock bag and bringing out my rolling pin...it's a good way to get out aggression, too.)
  2. In a large bowl, combine the oreos with cream cheese- I find a just shy to 50-50 ratio is yummiest, but you can taste as you go (since there are no raw ingredients) more cream cheese makes for a smoother richer inside, less means more oreo flavor. Mash with your hands until blended.
  3. Roll into equal sized balls, and lay out on wax paper lined baking sheet
  4. In a double boiler, melt chocolate chips. Make sure you have enough to cover your truffle balls, extra chocolate can be used for experiments (turns out chocolate covered tortilla chips are delicious)
  5. If you wish, you can add shortening, a bit of cream, or coconut oil to your melting chocolate, this can help it go on smoothly
  6. One by one, drop an oreo-creamcheese ball into the melted chocolate, roll it with a fork to cover on all sides, then use the same fork to fish it out, and lay it back on the wax paper
  7. When you have coated each ball with chocolate, move your baking sheet to the fridge or freezer to harden the chocolate
  8. Voila!
  9. Store in the fridge or freezer, and don't eat too many at once.


Thursday, January 12, 2012

Blueberry Sour Cream Cake

To continue my week of Martha Stewart recipes, I made this blueberry sour cream cake. The slight hint of sour, a dash of lemon zest, and a dense moist texture make this summer-y blueberry cake totally comforting, even in the middle of January. Frozen blueberries can be substituted for fresh so long as they are thawed and drained before use.


The recipe was actually for a pound cake, but I made it in a scalloped ceramic pie pan, just for a pretty result. Scallops= pretty. The shape, not the seafood. Though I am a fan of that kind of scallop, too. 

Pound cake is fascinating to me. Is it weird to be fascinated by a type of cake? I think it's the lack of leaveners and odd proportion of butter and eggs that really gets me. Traditionally made with a pound of flour, plenty of butter and sugar, and no baking soda or powder, it's no wonder the result is rich, but admittedly it can sometimes turn out too dense. I found the texture of this cake to be pleasant though, instead of super heavy.

 The original recipe did not call for lemon zest, but rather for lemon whipped cream on top. Sounds delicious, but I decided to skip the cream for now, as it is recently post-new years, and I am at least pretending to be healthy. Apparently in my mind cake= healthy, but once you add whipped cream...forget about it.

Adapted from Martha Stewart

Note: the original recipe was doubled, I decided to make only one cake, hence some odd numbers like 4 and a half eggs. To see the original recipe click the link above. Be prepared though, it calls for 3 sticks of butter and 9 eggs!
1/2 lb  + 1 Tablespoon Flour
1/2 Tablespoon coarse salt
1 1/2 sticks unsalted butter (+ some to butter pan) softened
1/4 cup sour cream
1 cup sugar
1/2 teaspoon vanilla extract
4.5 large eggs, room temperature (yeah, sorry about that half egg thing...)
1 cup blueberries fresh, or frozen (thawed and drained)
zest of one lemon
1 Tablespoon powdered sugar 

Directions:
Oven temp: 325
1. Cream together the sugar, butter and sour cream with a hand mixer or standing mixer.
2. Add eggs and vanilla slowly to butter mixture and continue to blend
3. Add the lemon zest to the butter/sugar/egg mixture
4. Combine the flour and salt in a separate bowl
5. Fold together the flour mixture and the wet ingredients until smooth
6. Fold in the blueberries
7. Butter your baking dish and pour in the batter
8. Bake until a toothpick comes out clean, up to 65 minutes.
9. Let cool, then sprinkle with powdered sugar.


Wednesday, January 11, 2012

Mushroom Tart

One of the first places I look for food inspiration is Martha Stewart's website.  She is so good at everything you sort of want to hate her, right? And she has built an empire. But then you try a couple of her recipes and see how easy and delicious they are. A few martha stewart recipes I have posted on this blog so far include Bacon Jam (which was such a hit this New Years!),  Roasted Roots and Tubers Pizza, and Spiced mixed nuts.  I spent some time browsing her website now that I am back in action blogging recipes, and I decided to do a week of Martha. It just had to be done. And to kick it off right, I made this beautiful and simple Mushroom Tart.


The process is simple, the result rewarding. A sheet of puff pastry, baby spinach, goat cheese, a clove of garlic, and a variety of types of mushrooms (I used cremini and shataki.) If you can saute vegetables in pan, you can probably make this delicious appetizer.


Mushroom Tart
Recipe inspired by MarthaStewart.com, however my steps and choice of ingredients differ a bit
Ingredients:
1 sheet of puff pastry
1 TBS olive oil
1 lb of mushrooms of your choice, sliced
a handful of baby spinach
1 clove of garlic, minced
soft goat cheese
1 TBS melted butter

1. Heat olive oil in a pan over medium heat
2. Add minced garlic, allow it to cook a couple of minutes until just golden
3. Add the mushrooms to the pan, and cook until they are tender
4. Fold in the spinach
5. Lay out your puff pastry (the instructions on the box may suggest to allow it to sit for 10 minutes to defrost) on a buttered baking sheet
6. Top with your mushroom mixture, salt, pepper and sprinkle with goat cheese
7. Using a pastry brush, apply the melted butter to any exposed edges of puff pastry
8. Bake at 400 for 15 minutes, or until edges are golden and crisp

Notes:

This tart would be delicious with any variety of wild mushrooms. I droll imagining it with Hen-of-the-woods. My choice of and shataki is easy to find at grocery stores and relatively inexpensive. I used primarily the cremini (also called baby bella), and suplimented with a couple of shataki mushrooms sliced thin (tough stems removed)


The secret for perfectly browned puff pastry (which is luckily the sort of item even serious chefs buy premade from the grocery store...hence the ease of this recipe) is to brush any exposed parts with either melted butter or egg wash to aid in browning. You can choose to do this step at the end, removing the tart from the oven a few minutes before the end of the cook time, buttering it and returning it, if you are worried about the edges burning, or include it as a step before placing the item in the oven.

If you are making this ahead of time a few additional minutes to heat up in the oven (preferably on a pizza stone) will bring back any crispness it may have lost from sitting out. I made this early in the day (to accommodate bright sunlit pictures) but served it at night. A quick heat-up was all it needed.

Sunday, September 25, 2011

Black Bean Soup & Sweet Potato Biscuits


When people ask me what my favorite thing to cook is, I almost always answer with some sort of soup. French onion some days, butternut squash, perhaps a lively and spicy black bean soup, like this one. To me, cooking soup seems like a nearly magical process. Brown a few simple ingredients in the bottom of a large pot, perhaps onions cooked until translucent and lightly sweet, garlic and herbs, add liquid, a few other choice ingreidients, cover the pot and... Magic happens. Water becomes flavorful broth,  dense root vegetables become soft and sweet. Herbs and spices mingle on your tongue, and the whole thing can be sopped up with a nice piece of hearty bread.

We have had our first few days of true fall weather recently, the rare moment in time where 50 degrees feels just chilly enough to curl up in a blanket on your couch with a book and make every excuse not to leave the house, or run all the errands you need to. (Or is that just me?) As the months wear on, we will grow accustomed to the colder weather, and a 50 degree day will seem like such a luxury, a moment to take back out our summer clothes. But at the end of the summer, with the certain crisp air only fall can bring, 50 degrees means it's a time to make soup; to comfort yourself.

I made this soup with my (lovely and pretty) friend Sophie, one of my oldest friends, whom I met in pre-school. We attempt now to cook dinner together every Friday (before settling in to watch Fringe-- any other Fringe fans out there? WHERE IS PETER BISHOP??) and her regular email to me "What should we make this time? Should I bring wine?" has been a great motivator of many of my food posts on this blog.

This time around, unsure what to make, I linked Sophie to my pinterest board for food inspiration. She responded pointing out that many of the recipes included sweet potatoes, and it had her thinking about the African Sweet Potato Stew I often make. Since I have already blogged that recipe, I suggested making a different sort of soup, and pairing it with the Sweet Potato Biscuits I had pinned and had been wanting to try. I suggested black bean soup particularly for a few reasons:

1. I love black bean soup
2. I love the way black beans pair with sweet potato- like in this recipe
3. The ingredients for black bean soup are cheap- no lies, this is always a good motivator for me

In the end we both loved the combination, and the leftover biscuits were great for breakfast the next day, too.

too bad I can't master the perfect sour cream dollop at the moment
Since we followed the biscuit recipe with no alterations I am not including the steps in this post, but you can head over to this link to see the original recipe- it's easy and delicious, they turned out flaky and just a tiny bit sweet. Like with pie crust, the key is to keep the butter cold and handle minimally. We ended up having to handle our biscuit dough more than we intended, but even so they were tender and flaky.

The only note I would make about the above recipe, is if you are short of time, peel and poke some holes in your sweet potato, then microwave it for about 3 minutes before mashing instead of baking it. We also chose to keep our sweet potatos mashed in a chunkier style, I liked the chunks of sweet potato in each bite that this created.

And for the soup...

This soup was adapted from a recipe from Eating Well. The recipe I started with was very basic, but gave me just the guidelines I needed. I supplimented it with 2 large cloves of garlic, more lime and cilantro than it called for, and where they asked for prepared salsa I used Trader Joe's Habenero Lime salsa which really added a lively kick. If you don't have a salsa like this available to you, I would suggest adding some diced fresh hot pepper and doubling the lime juice.


Adapted from Eatingwell.com

Ingredients:
1 tablespoon canola oil
1 onion, diced
1 tablespoon chilli powder
1 teaspoon cumin
2 or 3 cloves of garlic, minced
2 15oz cans of black beans, rinsed
3 cups of water
1/2 cup prepared salsa- I used Trader Joe's brand Habenero & Lime Salsa
Salt to taste
Juice of one lime
fresh cilantro chopped, plus some additional for garnish
Sour cream to garnish

Process:

1. In a large pot heat the oil. Add chopped onions and cook until translucent- less than 5 minutes
2. Add to pot: cumin, chilli powder, minced garlic, stir and cook 2 minutes
3. Add rinsed beans, salsa  and water. add salt to taste, and adjust spices as needed at this point (remember that the heat of the soup will vary depending on what salsa you use)
4. Using a traditional or immersion blender, blend mixture minimally so that some chunks remain.
5. Add the lime juice and cilantro before serving, add additional cilantro to garnish, as well as a dollop of sour cream if desired.

Serve with cornbread, biscuits or something else delicious. Feel happy. Go watch Fringe.

Wednesday, June 1, 2011

Banana Rum Caramel Bread Pudding


Holy goodness, guys. I really can't think of anything else to say. Somehow "holy goodness" is an exclamation that comes out of my mouth sometimes. Is goodness holy? I don't even know. Whatever. But seriously. Hot, gooey bananas, custardy challah bread, and a drizzle of rum-y caramel? Yes, please. Mother, may I? Holy goodness. Jabberwocky. I can't even make sense right now.

For the record, these are far superior served warm, so the caramel is melty and gooey and so are the bites of chopped up banana. I was a bit impatient reheating one, and learned the hard way. It was still pretty yummy, though.

I used Challah bread I had in my freezer from the last time I made french toast. If you don't live in an area where this is available (ie, not in an area with a large Jewish population) other types of egg bread or brioche would both be good. I love how Challah is lightly sweet and fairly dense and chewy, so it works perfectly to soak up eggy custard in bread pudding or french toast.

I loved every step of this recipe, and it was a recipe with many steps. I suggest only making this when you have the proper attention to pay it, as getting distracted while making caramel sauce never ends well (have you ever tried to get burnt caramel off of your favorite pan?).

I have mentioned before that I love the feeling of becoming totally involved in the steps of a recipe, the complete zen mindfulness this process creates for me. This was just that kind of recipe, though actually each step was easy and pretty quick. Basically I made the rum caramel sauce first, set it aside. Then sliced the challah bread into 1 inch cubes, lay them out on a baking sheet, and cooked them until lightly browned, and dry. Then made the custard. Then sliced the bananas, and cooked them breifly in a pan with a glaze made of  butter, brown sugar, rum and lemon juice. In the end I assembled them in ramekins for cute individual servings, layering in the bread, bananas and custard. After some time in the oven, I let them cool and then drizzled them with my caramel sauce, which I had poured into a plastic bottle once it cooled down to lukewarm. So, so perfect.

You can see the full recipe here from Bon Appetit. I halved the recipe and made 4 individual servings in 1-cup ramekins.

Tuesday, May 10, 2011

A Perfect Sunday- and how to a make a red wine, onion and blue cheese tart

I just had a birthday. A couple weeks ago, actually. It was delicious. I decided instead of throwing a big shindig like I sometimes do, which for me can lead to feeling stressed out and overwhelmed and can take on a bit of "must have fun" pressure, I actually just wanted to create my ideal Sunday (since my birthday fell on a Sunday this year) and not even really think of it as a birthday celebration. Luckily for me, I have a close (and yet so far away) friend from Australia who was slated to visit over the week of my birthday this year. If I could create an ideal Sunday it would definitely include having her around! (If you see her, won't you tell her to move to Boston?)

Other things my ideal Sunday would include?
  •  waking up early
  • doing a bit of organizing around the house (is it strange that this is truly one of my favorite activities?)
  • having a leisurely breakfast, either at home or at a diner
  • doing a little bit of baking in the morning- in this case a pie crust which I popped in the fridge to chill during the course of the day
  • stopping in for a fruit smoothie at a favorite local place
  • on the way to....attending a matinee of a new show at a local theater
  • and then spending the evening sipping wine with a couple friends, nibbling on cheese, and baking off a few tarts
Doesn't that sound perfect? OK, I understand that not everyone has the same love I do for organizing, or waking up early, or even making pie crusts. But to me? Bliss.

And what was that baking that I did?


Well, I made my new favorite cake, Chocolate Red Wine Cake


And I made some simple and delicious savory tarts. One of them had sun-dried tomatoes, pesto, and goat cheese, and some (yes, this is the one I keep talking about but not posting) had red wine caramelized onions and blue cheese.


 I also cracked open a few bottles of  my favorite Reds and Whites from Trader Joe's, and served a nice cheese plate a bit like this one.

And finally... for anyone wishing to know more about the oft mentioned red wine onion tart, which really, you ought to, here is the basic process:

1 pie crust:
Flaky Pie Crust (from Mark Bittman's How To Cook Everything)
1 cup plus 2 tablespoons all-purpose flour, plus more for rolling
1/2 teaspoon salt
1 teaspoon sugar
8 tablespoons (1 stick) cold unsalted butter, cut into about 8 pieces
3 tablespoons ice water, plus more if necessary
 
I still adore the ease, flavor and flakiness of Mark Bittman's "flaky pie crust". All you do is combine flour, cold butter, a bit of salt and a bit of sugar in a food processor, pulse for a few seconds and then dump out on your work surface, combine into a ball [adding some icy cold water as needed] then throw into the fridge for a while to chill, and roll out a few hours later. Easy as pie. Really. And the flavor is spot on for a savory tart like this one. If you don't have the luxury of starting this project the day or morning before, you can of course use a frozen pie crust from the grocery store, though I have yet to find one I like as much as this simple from scratch version.

For the filling:
(my own recipe, and as usual, I measure with my eyes not measuring cups, so all measurements are estimates, feel free to adjust to your taste)
2 large red onions, sliced thinly
2 tablespoons unsalted butter
1 3/4 cups dry red wine
1 tablespoon balsamic vinegar
1/2 tablespoon brown sugar
1 ounce blue cheese, crumbled

1.Roll out the crust and place it in a tart pan, poking a few holes in the bottom of the crust before par baking for 15-20 minutes at 375, or until edges begin to brown.

2. In a heavy bottomed pan, melt the butter, then add the sliced onion. Cook until translucent, about 10 minutes.

3. Pour the wine and balsamic into the pan, cook until reduced so almost no liquid remains. Add the brown sugar towards the end. Taste before you go any further, the onions should be sweet and complex, if too sweet for your taste add more wine or balsamic, if too wine-y add more sugar or reduce further.

4. into the par baked shell, pour the onion mixture and spread to cover the bottom evenly. Sprinkle the blue cheese over the top.

5. Finish for an additional 10-15 minutes in the oven, allowing the cheese to melt.

6. Remove from the oven and let cool before slicing.


the blue cheese adds the perfect sharpness to contrast with the sweet reduced red wine and caramelized onions. 

Oatmeal cookies for my mom


Mother's day was this weekend, and so I surprised my mother with one of her favorite things: Oatmeal cookies. I have my own personal favorite oatmeal cookies posted on this blog already, crispy with orange zest and cranberries, but I wanted to make her a more traditional soft, chewy oatmeal raisin cookie.

I am so lucky to have my mother in my life, she is the most supportive and generous person, not only is she always there for me and my sister at a moments notice, she is emotionally supportive to so many family members and friends. I think she is the kind of person that people think of when they just need someone to talk to, and she has close, nurturing relationships with so many people it is astonishing.

She has also taught me my entire life that it is more than OK to march to your own drummer, follow your passions, and not let anyone make you feel unimportant or wrong for being yourself. She is such a passionate person, and when she likes something she REALLY LIKES IT and is not afraid to let it show. Just ask her about the lengths she has gone to for her favorite hobby, standing in the pit at Bruce Springsteen concerts every time he tours- She has traveled to other states to see him, and stood outside all day in the winter to get those prime GA spots.

As I get older, I notice how nice it is to get to know your parents in a more grown up way, and it has been fun talking to her about when she was in her mid twenties and had just moved to Boston, I can tell so many ways we are so alike, and some ways we are different, but the coolest part is I can tell that if I met her 24 year old self, we would probably be friends.

As an odd coincidence, the apartment I am in now (which I found and moved to while my parents were out of the country) turns out to be just 2 blocks from her first apartment in Boston. She moved here for library school, right around my age, and found a roommate in the classifieds in a local paper. I moved back to the Boston area from the Berkshires two years ago, found my place and roommates on Craigslist, and now that I am going back to school I have even been considering programs at her old school. I currently am studying her undergrad major, too.

I love you Mom, thanks for being so awesome. You deserve lots of oatmeal cookies!

Chewy Oatmeal-Raisin Cookies
From Baking Illustrated

I stuck to the exact directions here, didn't change anything (except some comments I'm sure you'll spot), as I know that the cook's illustrated people put in much more thought and science than I do (though I did make the cookies smaller rather than larger, so I could feel better about eating several...I adjusted the cooking time accordingly). I ended up wishing I had smushed the cookies a little flatter, but other than that was quite happy with them. The fresh nutmeg is really what makes them fantastic. In the strange way in which the Stop & Shop near my house always runs out of really normal items, I could not find a single bag of raisins on my trip there, and so used dried cherries. What's up with the out of stock raisins, S&S? Also, that time I went to you for red onions, tangerines and and boneless chicken thighs and you were out of all them was way uncool, too.

These are particularly good warmed up a bit before you eat them, even just 15 seconds in the microwave- you won't regret it. Maybe served warm and with a small scoop of french vanilla ice cream?

On with the recipe...

Yield: 18 cookies
1½ cups (7½ ounces) unbleached all-purpose flour
½ teaspoon baking powder
¼ teaspoon freshly grated nutmeg
½ teaspoon salt
16 Tablespoons (2 sticks) unsalted butter, softened but still cool
1 cup packed (7 ounces) light brown sugar
1 cup (7 ounces) granulated sugar
2 large eggs
3 cups old-fashioned rolled oats
1½ cups raisins

1. Adjust the oven racks to the low and middle positions and heat the oven to 350 degrees. Line 2 large baking sheets with parchment paper or spray them with nonstick cooking spray. ( I actually just used a silcone mat and called it a day)

2. Whisk the flour, baking powder, nutmeg, and salt together in a medium bowl.

3. Either by hand or with an electric mixer, beat the butter on medium speed until creamy. Add the sugars; beat until fluffy, about 3 minutes. Beat in the eggs, 1 at a time.

4. Stir the dry ingredients into the butter-sugar mixture with a wooden spoon or large rubber spatula. Stir in the oats and raisins. Find excuses to have to eat a lot of the raw batter.

5. Working with a generous 2 Tablespoons of dough each time, roll the dough into 2-inch balls. Place the balls on the prepared baking sheets, spacing them at least 2 inches apart.

6. Bake until the cookie edges turn golden brown, 22 to 25 minutes, rotating the baking sheets front to back and top to bottom halfway through the baking time. Let the cookies cool on the baking sheets for 2 minutes. Transfer the cookies with a wide metal spatula to a wire rack. Let cool at least 30 minutes.

Thursday, April 21, 2011

Recipe Round Up- My Top 3 Cookie Recipes

So I let my 1 year bloggiversary pass right by. I first started this blog on March 30th, 2010, after a rather drunken discussion with a couple of my roommates over my secret aspiration to be really cool like all those food bloggers whose posts I followed. That particular night I cooked up some steak topped with shallot red wine sauce. That particular sauce, made by caramelizing the shallots in butter, adding red wine, a touch of balsamic and a pinch of brown sugar then reducing to perfection, is actually the base behind my recent onion tart. So, that is kind of symmetrical in a nice way, isn't it? I will be posting that tart soon, I swear.

In the meantime, to mark the end of my 1st year of food blogging (and the start of my second!), I thought I would revisit some more favorites, like I did in this post.

But this time, I am going to look at my favorite recipes in specific categories.

My Top 3...

Cookie recipes:

1. Classic Crinkle Cookies-
these have become my go to chocolate cookie! I made a giant batch at thanksgiving and they worked out great. I made the batter at home, froze it overnight, and then brought it in a little cooler to new jersey for my family's thanksgiving celebration. By the time we got there it had thawed enough, and I was able to roll them in confectioners sugar and bake them off. They were rich, chocolaty, and delicious, garnering lots of compliments, and they were an especially good choice for a large event because they are dairy free.

2. Crispy Oatmeal Cookies with Orange Zest and Cranberries (otherwise known as the best oatmeal cookies)-  The bright citrus-y orange zest really shines through in these crispy, just sweet enough oatmeal cookies. I have made them both with butter and margarine, and this is one cookie I am actually perfectly happy with subbing out all the dairy. One batch makes a lot of cookies (up to 48) but trust me, you'll be glad you made that many!

3. Seedy Snow-day Cookies
Luckily it's actually a pretty nice day today around here- cloudy, but mild enough (52 degrees currently) so I don't have to worry about snow. It sure puts things in perspective to remember back to all the snow days this winter- this morning I was standing at the T station shivering- but at least it wasn't snowing!
I made these when I was snowed in, and they were quick and easy, and I loved the sweet, delicate flavor. Poppy and sesame seeds add an unexpected twist to a basic butter-y cookie.

Do you have any all time favorite cookie recipes? I'll be back soon with some more categories of favorites!

Tuesday, March 22, 2011

Red Wine + Cake + Red Wine

Some of you may have noticed I went a bit awol this week, even after teasing to post recipes for both Brown Butter and Sage Mashed Potatoes with Sharp Cheddar and a really yummy citrus-y beet salad. Those are still to come, up until now I had no time!

And why did I have no time? Because I decided, with only a week before the application deadline, that I would really like to go back to college. I may have mentioned on here before that I am taking a course in the mornings before work at a local community college, and originally it was my plan to keep at it that way for a few more semesters before applying to a university. Well, I got a sudden idea in my head that I don't want to wait! I want to start asap. I will still have to find a way to balance work, but I think some big changes could be in store for me come september.

Anyway, all of this is to say that I spent the last several days writing a college essay, and calling the admissions office over and over to discuss transfer credits, and tracking down someone to write a recommendation letter, and discovering that my SAT scores have expired.

It has been a whirlwind few days. Especially with my class back in session now after break, and my job really picking up with the spring market. And by the end of a couple days like that all I really want is a little red wine. And some chocolate cake. And some more red wine, which happens to be baked into the cake. Yes.

You can find the cake recipe right here it's an absolute winner, so simple to make, and really moist and delicious. I think this will be my new go to chocolate cake recipe. The ingredients are so simple! I was concerned with only unsweetened cocoa called for that it would not be chocolaty enough, but it really surprised me!

Sunday, February 13, 2011

Lemon Buttermilk Pudding Cake


Lemon. Buttermilk. Pudding. Cake. Yes, really. To me every single word of that is so right. It sort of makes me drool. Of course I love lemon. And buttermilk makes me think of perfectly sour sweet pancakes and waffles drizzled in syrup. And if I don't have to decide between pudding and cake, well, perfect, I don't want to.

A texture halfway between mousse and lemon pie filling, served chilled and topped with blackberry sauce, this dessert was bright, fresh tasting and a perfect spot of sunshine in the seemingly eternal darkness that is the month of February. I sat, I lifted each bite slowly. I didn't multitask with my computer or a text book at my side, I had no pressing thoughts on my mind. I sat and let myself be entranced by sweet and tart lemon and blackberry.


To be honest, above all of those things, the thing I loved most about this recipe was the process. This recipe included everything I love about baking- it made me feel like a baker. I zested lemons and squeezed their juice. I separated eggs and whipped the whites into a rich creamy froth. I whisked together dry ingredients then added the wet, I folded it all together in the end so gently to keep the egg whites from falling, and cooked it in individual ramekins in a water bath. Many of these steps would once have baffled me. Only a couple of years ago had I never even baked a cake from scratch. I felt like calling the pastry chef who taught my baking class, and thanking her for giving this to me, this knowledge and confidence, and the realization that sometimes the intimidating steps are the best, most rewarding and soothing. You can't pick up the phone and do something else while you are folding in egg whites, you  must go to a zen baking place (try not to laugh at me for saying that... Also, if you can imagine that phrase said in Mr. Myagi voice, please do. Wax on, Wax off.) and stay engaged in the task at hand. I find it so calming.

And of course, the reward at the end is quite lovely, too.


Lemon Buttermilk Pudding Cake
from Big Small Plates by Cindy Pawlcyn

Ingredients:
2/3 plus 1/4 cup sugar
1/2 cup flour
1/2 cup freshly squeezed lemon juice
2 tablespoons finely grated lemon zest
1 1/2 cups buttermilk
4 tablespoons butter, melted
3 large eggs, separated

Directions:
preheat the oven to 350 degrees

1.In a large bowl whisk together 2/3 cup of the sugar, and all of the flour
2. Add the lemon juice, zest and buttermilk and whisk until smoothly combined.
3. In a separate bowl whisk together the egg yolks and melted butter, then add them to your buttermilk mixture
4. In another bowl, using a standing mixer if you have one, with the whisk attachment, whip the egg whites until frothy. Add remaining sugar and then continue to mix until soft peaks form.
5. fold the egg whites into the buttermilk mixture gently until mixture is thick and smooth
6. Pour batter into 6 to 8 ramekins, or one eight inch square baking dish
7. Set the dishes in a large lipped pan, filled with water so that the water reaches halfway up the sides of the dishes
8. place in the oven, bake for 25 to 30 minutes, the top should look dry and beginning to crack, but still jiggly underneath.
9. Remove from oven and let cool. chill before serving.
10. to serve, turn individual ramekin serving onto a rimmed dish. Drizzle with berry sauce or fresh berries.

I made a blackberry sauce with frozen berries from the supermarket, the process to do this is simple:

Easy berry sauce
frozen or fresh berries of your choice
1 TBS fresh lemon juice
1/4 cup sugar (alter as needed depending on sweetness of the berries)

let the 3 ingredients simmer in a pan, mash the berries with the back of a spoon or with a potato masher as they simmer. If you wish for a thicker sauce, cook down longer and add a teaspoon of corn starch. You can also choose to strain out the seeds and use only the liquid if you wish.

Saturday, February 12, 2011

Brie Pastry Squares

I made these brie pastry squares to bring to a friend's the night of the Superbowl. Then I felt too tired to go (you know you can't be well when your body tells you 5pm is bedtime...) so I ended up eating most of these myself, while not watching the superbowl. It was weird. But, they are yummy and buttery and crisp and don't require silverware or proper manners, and are also super easy to make. Maybe you want to make them as an appetizer at your next dinner party? I imagine they are great for snacking on while milling around and socializing with a glass or two of wine. I can say from experience that they also are great for eating in your pajamas at 6pm alone in the house, in  place of a real dinner.


The process was easy as pie (er, easy as baked brie):

4 ingredients:
frozen (defrosted) phyllo dough or puff pastry (I used Trader joe's All-butter artisan puff pastry)
brie cheese
jam/jelly
1 egg, beaten and applied as a wash

Spread out your sheet of phyllo dough and paint on the egg wash with a pastry brush. Slice the brie (which I bought in a roll instead of a wedge or wheel) into even slices.

Arrange the slices of brie on the dough, and top with jam of your choice. I used apricot jam which I infused with brandy for extra interest. I think fig jam, or spicy/sweet pepper jelly would also be great options.

I originally imagined these not as square but as purses of  phyllo dough filled with melty brie and sticky fruit jam. Kind of like that yummy baked brie at holiday parties, but with no need for crackers or bread to scoop it up with. I folded my adorable little purses, washed the top with egg, and put them in the oven.


sadly when they came out they had un-pursed themselves, and were more like brie-pastry boats... I tried to seal the edges with egg wash and squeeze together, but somehow it just didn't work out. I think I probably just cut the dough too small to seal tightly on top.

While I thought these weren't as cute as purses I actually still thought they looked kind of nice. I ate one though while pondering how to fix the design and discovered that the pastry-brie ratio was off, and mostly you just tasted pastry. I decided to make the next ones with less dough, cutting it only a bit larger than the brie circles

Back into the oven (on a parchment lined baking pan, oven preheated to 400, for 6-12 minutes, or as directed by the instructions that came with your specific dough packaging.) When they come out the pastry is flaky and golden, and the cheese and jam are bubbly.


Sure wish I had a better picture of the finished product! It had gotten dark by the time I finished up, refer to the earlier "boats" to see how delicious and melty these would look in better light. :)

Wednesday, January 12, 2011

Seed-y Snow Day Cookies


These cookies are the right kind of seedy. They won't approach you in a dark alley, or make you question your safety, they will only fill you up with sweet nutty toasted seed goodness. They may also cause a drug test to reflect positive for opiates, but whatever.


The view from my living room window: tree limbs heavy with snow

Today is a snowday for most Bostonians. more than 2 feet on the ground already in many places, many businesses and schools declared they would be closing as of last night. Since I am home (my office was among the many closed) and safe and warm away from the big bad cold, I decided to bake something warm, using only things I had on hand. I browsed through my bookmarked recipes online and in cookbooks to decide on the perfect thing to make.

This recipe comes from Simplyrecipes.com, called Benne Wafers, they are simple sweet sesame seed cookies with a hint of lemon and vanilla. I only had half the amount of sesame seeds needed on hand, so I decided to add poppy seeds as well, which were left over from my lemon poppy cake. The resulting cookie is lightly sweet, pleasantly crisp, and a just a tad bitter from the poppy seeds. I suppose these may not be everyone's cup of tea, but I just can't stop eating them! So if you like crisp almost cracker like cookies, that are just a bit sweet, not overwhelmingly so, I definitely suggest trying these out. They were a breeze to whip up, minimal ingredients and minimal steps; they even cook quickly.

Sesame seed snow day cookies
From SimplyRecipes.com, Benne Wafers
1 cup sesame seeds, toasted / or 1/2 cup sesame and 1/2 cup poppy seeds for my variation
1 cup firmly packed dark brown sugar
4 tbsp. (1/2 stick) unsalted butter, softened
1 egg
1/2 cup all purpose flour
1/4 tsp. salt
1/8 tsp. baking powder
1 tsp. fresh-squeezed lemon juice
1/2 tsp. vanilla extract

Oven temp :325
1. Toast the seeds lightly in a pan over medium heat, until fragrant.
2. Cream together the butter and sugar, then add in egg and mix to combine.
3. Whisk together the dry ingredients and add to the wet, mix together
4. Add seeds, lemon juice and vanilla.
5. Place the batter by small spoonful on a greased cookie sheet, or one lined with parchment or a silicone liner. I used a silicone cookie pan liner similar to Silpat and it worked out wonderfully.
6. Bake for up to 15 minutes, or until browned on the edges. Remove from the oven and let cool.


Ok, I am off to drink some tea and then get back to my day's project (remember that yellow dresser? more on that soon).

Thursday, December 30, 2010

Lemon Poppyseed Cake

I own 2 Best of Gourmet cookbooks (1989 and 1996 I believe, thrifted), but until this week I had never actually made something from either of them. I guess I was a tiny bit intimidated. But I offered to bring dessert for Christmas Eve dinner (as well as a soup for Christmas night) and I wanted something lighter and a bit less sweet and rich to balance out all of the chocolates and cookies and goodies that we all seem to stuff ourselves with this time of year. Don't worry, I also made my favorite uber-rich chocolate fudge tart and even added a 1/2 tsp of orange extract to give it the chocolate/orange flavor combination I loved without the orange infused whipped cream.

I decided to make the Lemon Poppyseed Cake with Fruit Compote recipe from Gourmet. First I should say this: I was mildly disappointed by the cake, not the flavors, but the texture. It came out a bit too dry and crumbly. I was unsure whether I had perhaps overcooked it, or if the recipe was at fault. That being said, people seemed to enjoy it, especially served with the fruit compote, which lends it some extra moisture. I choose to make some lemon glaze to the top off the cake, which I think was also a good addition, lemon juice and zest gave it added interest and brightness, and made the top shiny and nice. I am open to suggestions if anyone has made a lemon poppy seed cake that turned out a bit moister, perhaps I will revisit this later with a similar recipe if I find something better. I quite enjoyed the delicate flavor though, and the compote was a nice addition to both the cake and the chocolate tart.


Lemon Poppyseed Cake
from Gourmet Magazine

  • 1 1/4 cup all-purpose flour
  • 2/3 cup sugar
  • 1/2 cup cornstarch
  • 1 tablespoon poppyseeds
  • 2 1/4 teaspoons baking powder
  • 1 teaspoon salt
  • 2 tablespoons butter
  • 1 cup skim milk
  • 2 teaspoons freshly grated lemon zest
  • 1 1/2 teaspoons vanilla
  • 1 large egg
  • fruit compote
For now I am not going to write out the steps, as I am planning to find a new similar recipe I am more happy with than this one before blogging it. If you wish to see the full preparation directions you can view them here. 

I chose to improvise a fruit compote with what I had on hand, so I did not follow this part of the recipe. here is what I used:

  • 2 bags frozen mixed berries
  • juice of 1 small lemon
  • 2 tablespoons sugar
  • 1/2 tsp corn starch
This is easy, but takes a rather long time. Simply combine the ingredients besides the corn starch in a sauce pan. simmer for up to an hour until berries are mostly broken down and liquid has cooked down a bit. Add the cornstarch if needed to thicken. Serve warm with cake.


And lastly, for the lemon glaze:


  • Zest and juice of one small lemon
  • 3  TBS Confectioners sugar
  • 1 TBS half and half (I had no milk on hand, but that would work fine too.)
Combine the ingredients in a bowl and whisk together, making sure to get rid of clumps of sugar. Pour over the top of the finished and cooled cake. Make a big mess, and end up deciding to serve the cake on a different plate, because you poured so much glaze over the cake it has now pooled up on the sides of your dish and is threatening to spill if you lift the plate.

Well, lesson learned, I won't be so intimidated by Gourmet, even they take missteps. This cake was good, but not as good as I had hoped, and after seeing what reviewers have said about it online, I feel certain that the dry texture was not from my own error entirely. I enjoyed this, and would happily nibble on it with compote and glaze, but I find I am not as enthusiastic with the finished product as I had hoped to be. Sigh.

Friday, December 17, 2010

Chocolate Chip Pumpkin Bread

A good friend came to me recently, after we had struggled to find time to spend together, and asked if our next get together could involve baking something for her mother. She had joined me last when I painted the chevron pattern in the kitchen, featured earlier this month, and while we worked we had been snacking on some pumpkin-chocolate chip cupcakes which we both enjoyed. We discussed, and decided to make something similar for her mother. We ended up making chocolate chip pumpkin bread, 2 loaves so my roommates and I got to enjoy the other. I dug up a basic pumpkin quick bread recipe in my trusty Betty Crocker Baking book, and all we changed was the spices, and adding the chips.


I used my stand mixer for good measure, but to be hones the batter was very easy to handle and mixed by hand beautifully. As this was rather last minute I opted to use canned pumpkin (which is what the recipe called for) though I have always been curious to try baking with homemade pumpkin puree.


At the last minute we decided to finish the gift loaf, to make it a little more special, with some piped on melted chocolate. Clearly I should work a bit on my piping technique, as I got equal amounts of chocolate on my hands as ended up on the loaf, it seems.


Chocolate Chip Pumpkin Bread

Adapted from Betty Crocker's Best of Baking
1 cup sugar
1 cup canned pumpkin (make sure not the get the kind with spices!)
1/3 cup vegetable oil
1 tsp vanilla extract
2 eggs
1 1/2 cup flour
2 tsp Baking powder
1/4 tsp salt
1 tsp cinnamon
1/2 tsp nutmeg
1/4 tsp ground ginger
1/4 tsp allspice
1/2 cup chocolate chips (or more to your liking!) optional: an additional half cup for melting.

The incredibly easy steps:
1. preheat your oven to 350.
2. combine pumpkin, sugar, oil, vanilla and eggs.
3.combine the dry ingredients then mix them into the pumpkin mixture
5.stir in your chocolate chips
6. pour batter into a greased loaf pan, should fit in one 8 1/2 x 4 1/2 or 9x5.
7. cook 50-60 minutes, or until your kitchen smells amazing and a toothpick inserted in the middle of the loaf comes out cleanly.


Monday, November 29, 2010

The Best Oatmeal Cookies

These are THE BEST oatmeal cookies. Don't believe me? Ask my mom. That's right. She said so. But also, I say so, and a bunch of other people who tried these cookies seemed to agree. Also, they have cranberries. Who could turn down cranberries? They are such a pretty color, and add such a sweet-tart element that plays off the subtle fresh taste of the orange zest in the batter. Try these, they are just what you need right now. Really, I think you need a cookie. You're so thin! You look famished! (By the way, how have you all enjoyed your various events and family time over thanksgiving? Do I sound like anyone's grandma yet? Maybe an aunt?)

But truly, you deserve a cookie. Not crazy about cranberries? Change em out. Go traditional with raisins, shake things up with dried cherries, appease your sweet tooth with dark chocolate chips (orange and chocolate are a great pair!) go nuts (add nuts!).

This recipe works surprisingly well substituting margarine in place of the butter originally in the recipe, I used earth balance, and I swear you can't tell (I really mean it, and I am somewhat of a snob about baking with butter).

Ok, enough chitchat, go make these cookies. Then bring me a couple at my office; I could really use a cookie like this right about now.


The Best Oatmeal Cookies
Adapted from this recipe from Gail Gand's Sweet Dreams

Makes 40-48 cookies
Ingredients:

  • 1 1/2 cups margarine or 3 sticks unsalted butter
  • 1 cup light brown sugar
  • 1 1/8 cup granulated sugar
  • 1 large egg
  • 3 cups rolled oats (not instant) 
  • Zest of 2 large oranges (or a little more than 2 Tbsp)
  • 1 1/2 cups all-purpose flour
  • 3/4 teaspoon salt
  • 2 1/2 teaspoons baking soda
  • 1 1/2 cups dried cranberries
Directions:
1. Preheat oven to 350 degrees (unless you are like me, and choose the make the dough in advance, refrigerate it or freeze it and than bake it off the next day- maybe I am just strange like that, I tend to start baking projects past 9pm, then get tired and want to go to bed in the middle.)

2. Cream together the butter and sugars. Doing this with a hand held or standing mixer saves a bit of effort, but is not entirely necessary. Butter will always get fluffier than margarine can, so don't sweat it if you are making this with earth balance and it doesn't really seem "creamed". I swear they will turn out good in the end.

3. Mix in the egg and orange zest.

4. In a separate bowl combine the dry ingredients: flour, baking soda, salt and oats.

5. Slowly combine the butter mixture with the oat mixture, then add the dried cranberries.

6. On a greased baking sheet form drop cookies approximately 1 tbsp each in size.

7. Bake cookies for 10-15 minutes until outsides are brown and the middle looks solid. Bake a few additional minutes for crispier cookies.

8. Let cool, bring one to your friend Hannah, who is sitting in her office, and once again forgot about her lunch break.