Before:

After:

1. Sand the surface lightly, and smooth out dried paint drips from the last coat of paint
2. Rip out the tracks that previously supported the drawers, and the flimsy composite board that previously sat under the drawers
3. Had 2 plywood shelves cut to size at home depot (I actually got 3, but later decided two would serve my needs better)
4. Sand and fill imperfections in plywood shelves. Prime with 2 coats of water-based primer
4. wrestle the shelves into place (I really can't describe that process with a word any less violent than wrestle. They fit so perfectly they stay on their own with out any brackets, that's a tight fit!)
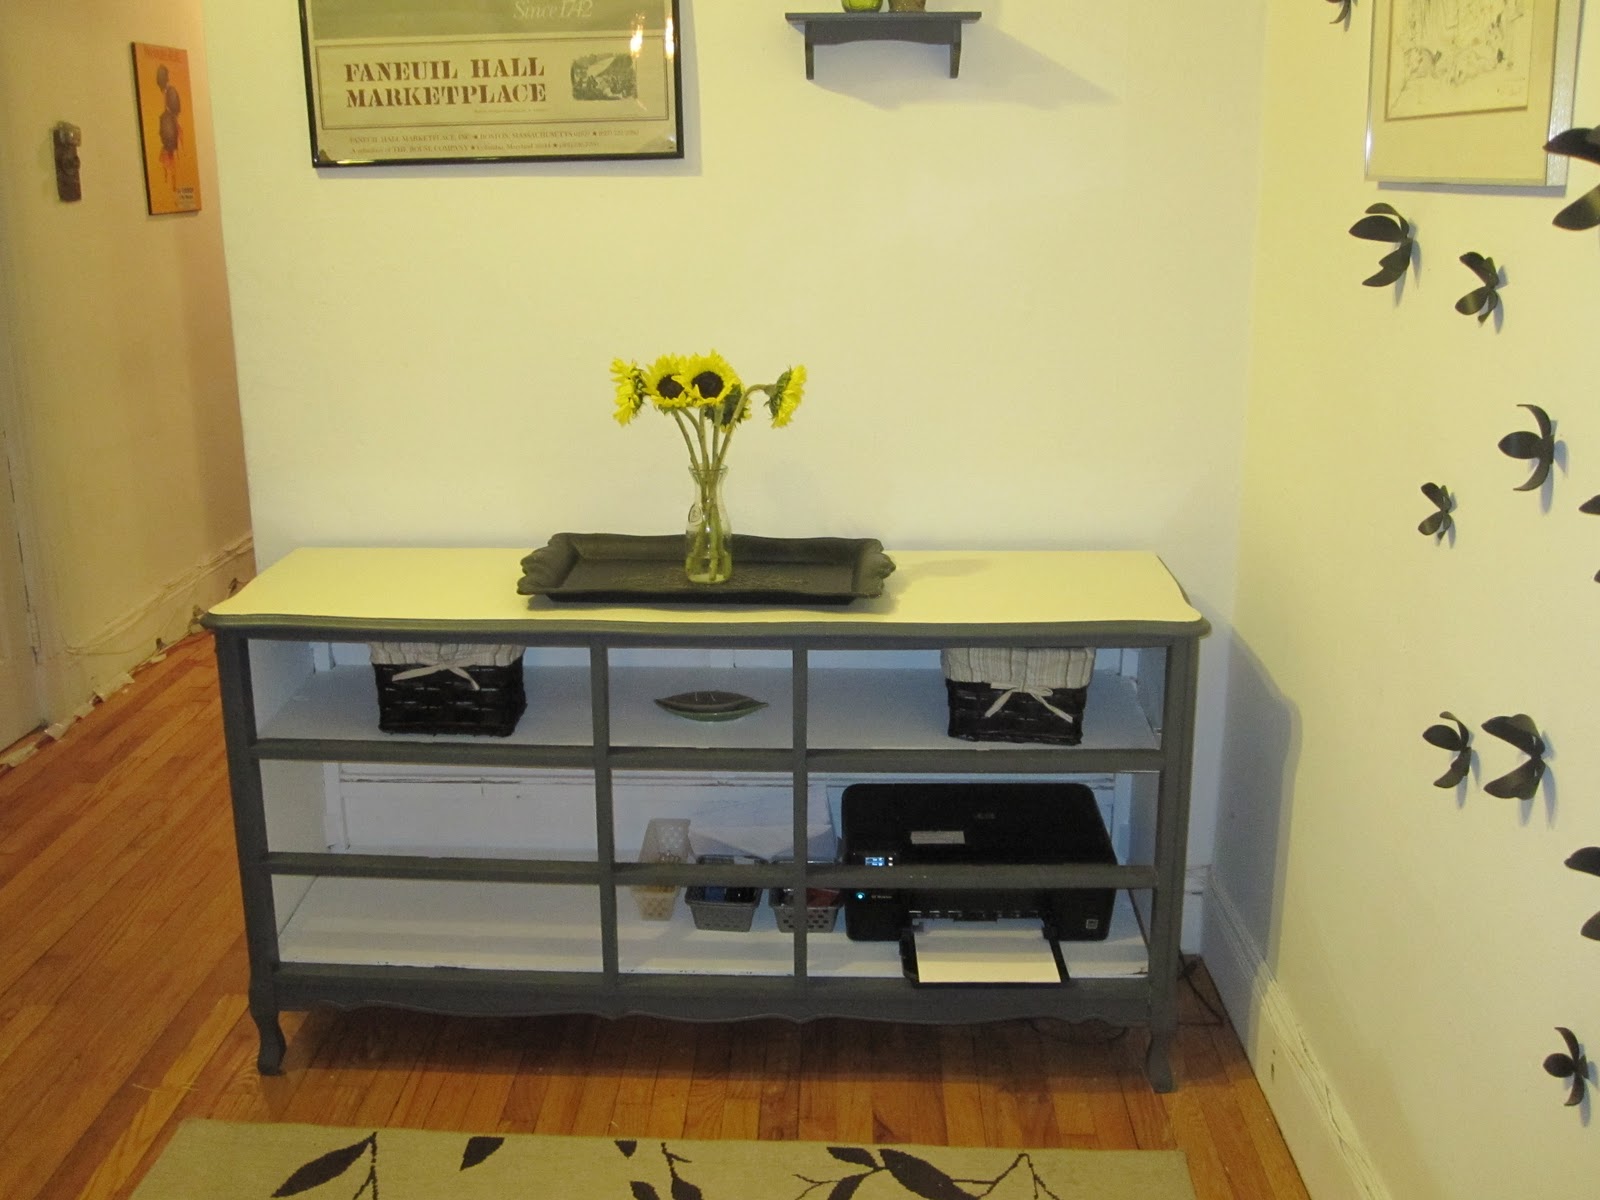
5. Prime and paint the dresser and shelves- the outside of the unit was painted a dark gray (I believe it was the true value color made simple line in "popular") The inside and the shelves were painted pure white. Since the top was laminate, I left it as is, without paint, but with a through cleaning.
Project cost breakdown:
Dresser- free, rescued from the sidewalk
1 qt water based primer $15
eggshell white latex paint- on hand, left over from painting the kitchen trim (let's call that free)
1 qt Satin paint in "popular" - $12
3 plywood shelves, bought and cut at home depot- $9 (I think...can't quite remember the exact cost, but it was something like that- I remember it was much cheaper than I expected!)
Total cost: $36-- not too shabby.
As for how I am using it, this piece sits in my foyer. I know the printer isn't the most beautiful decor item, but it is so great to have a wireless printer in a common space like this, since I live in a shared apartment, we all have our computers and office areas in our own bedrooms, and only need one printer between the 5 of us. I also put some office items out there in small containers, everything from pencils, a sharpener, paper clips and stapler, to business envelopes. The tray on top was a goodwill find a few months ago, which I either top with candles or a vase of fresh flowers if I have them. There are also a few small baskets from wallgreens for odds and ends to be tucked away in an easy accessible place.
I already bought materials to make the doors (MDF, trim, hinges and knobs) assuming the printer would be too ugly to have out in the open, but for now I am really liking how easy it is access, and honestly don't think it stands out too badly. I drilled a hole in the back panel of the unit to run cords through, and there is an outlet on the wall right behind, so the cords stay neat and out of sight, which is a big plus.
Great job! I have been wanting to create a piece by removing the drawers. Have yet to find what I want. Thanks for stopping by my blog,Extreme Personal Measures.
ReplyDeleteDenise
Awesome job! Thanks for stopping by my blog :) I wanted to follow you back but I can't find the Follow Button.
ReplyDelete@SJ- should be easier now, sorry about that!
ReplyDeleteBig improvement, looks great!
ReplyDeleteKate @ welcomedtempest.blogspot.com
@Denise- go for it, good luck in your search! I didn't find this piece, it found me- it was discarded only a block away from my apartment, and I passed it walking home from work one night. Hoping the right piece finds you. :)
ReplyDelete@Kate-
Thanks! and thanks for stopping by.